How to Reuse Waxed Amaryllis Bulbs After Blooming — Simple Guide

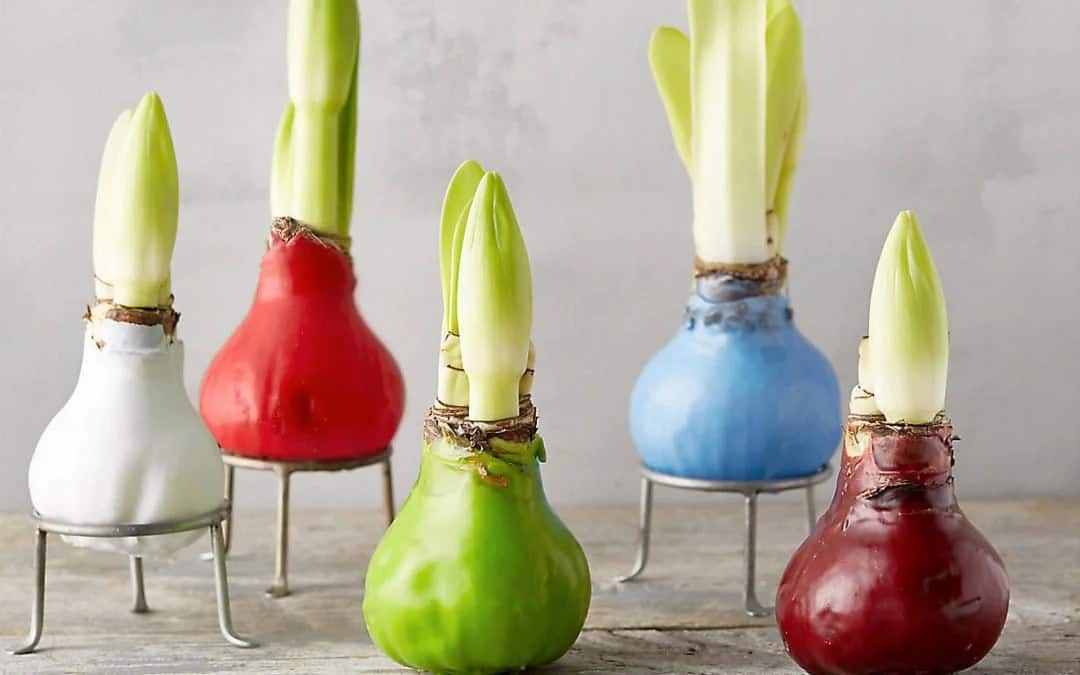
Waxed amaryllis bulbs bring a little magic indoors. Their tall flower stalks, dramatic trumpet-shaped blooms, and shiny decorative coatings make them a beautiful addition to winter tables, holiday displays, and cozy living spaces. I love how they offer so much color without requiring pots, soil, or regular watering. However, once those gorgeous flowers fade, I always face one big question: Can I reuse waxed amaryllis bulbs and enjoy another round of blooms?
The good news is that you don’t necessarily have to throw your bulb away. Although growers design waxed amaryllis bulbs for a single flowering cycle, you can sometimes rescue them and encourage new root growth. The process takes patience, careful handling, and a little gardening know-how. Success isn’t guaranteed, but the chance to turn a temporary decoration into a living plant makes the effort worthwhile.
In this guide, I’ll explain how to reuse waxed amaryllis bulbs after blooming, remove the wax safely, encourage root development, and care for the plant as it recovers. I’ll also share common mistakes to avoid and explain how to help your amaryllis bloom again in the future.
Can You Reuse Waxed Amaryllis Bulbs After Blooming?
Yes, you can try to reuse a waxed amaryllis bulb after flowering, but you should understand the challenges before getting started.
A traditional amaryllis bulb grows roots that absorb water and nutrients from the surrounding soil. A waxed amaryllis works differently. Growers remove its roots and seal the bulb in decorative wax, leaving it to rely on the energy and moisture stored inside its fleshy layers.
That stored energy helps the bulb produce its first flower stalk and blooms. Once flowering finishes, the bulb may have used much of its reserve. Without roots, it can’t replenish those resources efficiently.
To give it another chance, you’ll need to remove the wax, inspect the bulb, encourage new roots, and provide the right growing conditions.
Keep in mind that some bulbs won’t recover, especially if they have become soft, shriveled, or severely depleted. Others may produce leaves but need a full growing season or longer to rebuild enough energy for another flowering cycle.
My advice: Treat bulb recovery as a gardening experiment rather than a guaranteed way to get free flowers. If your bulb survives, you’ll gain a rewarding little plant. If it doesn’t, you’ll still learn something useful about how amaryllis grows.
When Should You Rescue a Waxed Amaryllis Bulb?
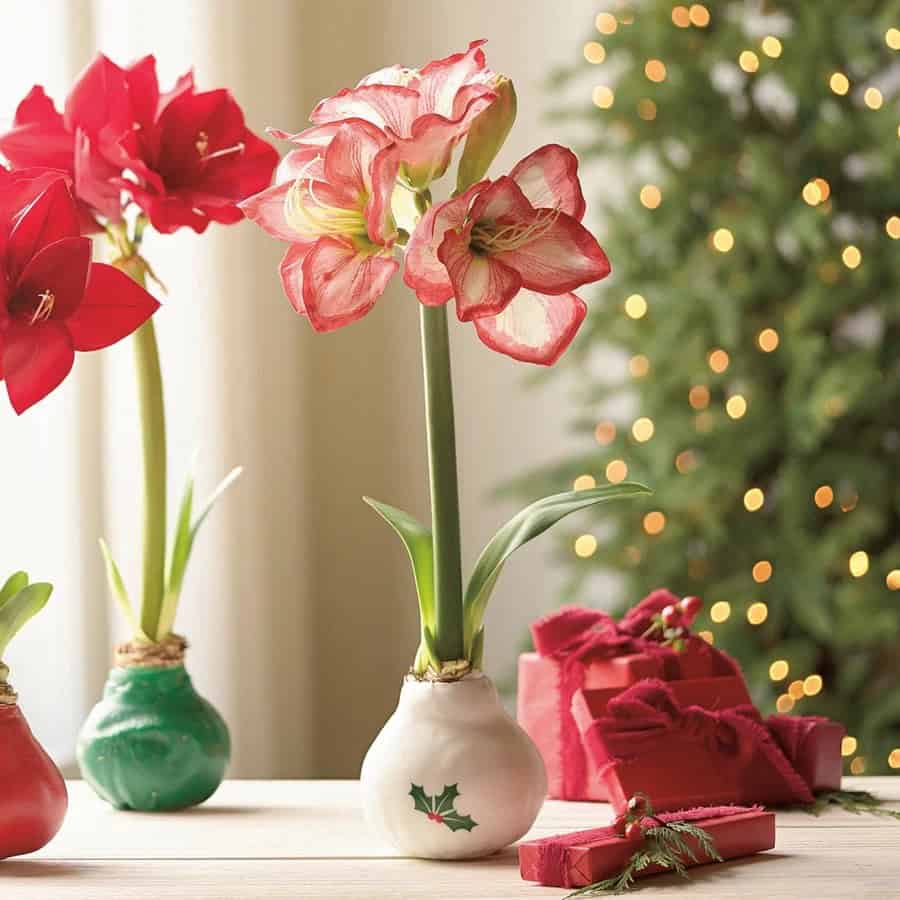
Timing matters when you’re trying to revive a flowering bulb. I prefer to wait until the flowers fade and the plant finishes its current display before attempting a full recovery.
Once the blooms begin to wilt, remove them to prevent the plant from spending energy developing seeds. If the flower stalk remains green, you can leave it briefly while the flowers finish fading, then trim it carefully near the top of the bulb without cutting into the bulb itself.
Don’t remove healthy leaves if they appear. Leaves help a recovering amaryllis capture sunlight and rebuild the energy it needs for future growth.
Before removing the wax, examine the bulb.
Look for these signs of potential recovery:
- The bulb feels firm rather than mushy.
- Its fleshy layers remain intact.
- You don’t notice a strong, unpleasant smell.
- The base hasn’t developed extensive rot.
- Some healthy tissue remains beneath the outer coating.
A slightly wrinkled bulb may still have a chance, but a severely shriveled or rotten bulb will struggle to recover.
Step 1: Remove the Decorative Wax Carefully
The first step in reusing a waxed amaryllis bulb is removing its coating. This process requires patience because you don’t want to damage the living tissue underneath.
How I would remove the wax
- Let the bulb reach room temperature. If the wax feels brittle, allow the bulb to rest indoors before handling it.
- Inspect the coating. Look for natural seams, cracks, or loose edges where the wax separates from the bulb.
- Peel gently. Use your fingers to lift loose sections of wax. Work slowly rather than pulling large pieces away at once.
- Use a blunt tool if necessary. A plastic scraper can help loosen stubborn sections. Avoid sharp knives that could cut into the bulb.
- Remove remaining fragments. Take your time around the base, where the bulb may have a developing root plate.
Some waxed bulbs have thick coatings or decorative bases that make removal difficult. If the wax refuses to come away easily, don’t force it. Damaging the bulb’s base can reduce its chances of producing new roots.
Avoid heating the bulb to melt the wax. Excessive heat can damage the living tissue, and melted wax can cause burns.
Once you’ve removed the coating, inspect the bulb again. If you find extensive rot or soft, damaged tissue, recovery may be unlikely.
Step 2: Inspect the Bulb and Prepare It for Root Growth
After removing the wax, I would focus on the bulb’s base. This area is particularly important because it contains the basal plate, where new roots normally emerge.
If the bulb has old, dried roots or loose outer scales, remove only material that comes away easily. Don’t peel away healthy layers or cut into firm tissue unnecessarily.
If you find a small area of damage, assess it carefully before proceeding. Extensive rot is a serious warning sign, and aggressive cutting may cause further injury. Never plant a bulb that smells rotten or has widespread soft tissue.
Next, prepare a clean pot with drainage holes. Choose a container that’s only slightly wider than the bulb, allowing enough room for roots without leaving a large volume of wet soil around it.
Use a loose, well-draining potting mix. A quality indoor potting mix amended with perlite works well because it holds some moisture while allowing excess water to escape.
| Item | Purpose |
| Small pot with drainage holes | Allows excess water to escape |
| Well-draining potting mix | Supports roots while reducing the risk of rot |
| Perlite | Improves airflow and drainage |
| Clean scissors | Trims faded flower stalks or dead material |
| Bright windowsill | Provides light for healthy leaf growth |
Clean tools and fresh potting mix help reduce the chance of introducing harmful microorganisms while your bulb recovers.
Step 3: Plant the Bulb in Fresh Potting Mix
Once the bulb looks healthy enough to attempt recovery, it’s time to give it a proper growing environment.
Fill the pot with your prepared potting mix, then position the bulb with its basal plate facing downward. Spread any existing healthy roots gently over the soil if the bulb still has some.
Add more potting mix around the bulb, leaving the upper third to half of the bulb exposed above the soil. This helps keep the neck dry and reduces the chance of rot.
Press the mix lightly to stabilize the bulb, but don’t pack it tightly. Roots need both moisture and oxygen to grow.
Water the potting mix lightly after planting, allowing excess water to drain through the bottom. The soil should feel slightly moist rather than waterlogged.
From this point onward, the bulb needs regular but careful attention. Unlike its former waxed state, it now depends on water absorbed through its developing roots.
How much water does it need?

I check the soil with my finger before watering again. If the upper inch feels dry, I water thoroughly and let the excess drain away. If the soil still feels damp, I wait.
Never leave the pot standing in a saucer full of water. Too much moisture around a recovering bulb can encourage rot before new roots have a chance to establish.
Step 4: Give Your Amaryllis the Right Light and Temperature
After planting, place the bulb somewhere warm and bright. A sunny windowsill with several hours of suitable light can help encourage healthy leaf development, although you should avoid excessive heat from intense afternoon sun.
A comfortable indoor temperature of roughly 65–75°F (18–24°C) generally works well for active growth.
As the bulb recovers, watch for new leaves or signs of root development. You might see growth relatively quickly, but a previously waxed bulb may take several weeks or longer to respond. Some bulbs won’t recover at all.
Here’s a simple Waxed Amaryllis Bulbs Care reference:
| Growing condition | Recommendation |
| Light | Bright light, with gentle direct sun if tolerated |
| Temperature | Around 65–75°F (18–24°C) during active growth |
| Watering | Water when the upper inch of soil dries |
| Humidity | Normal household humidity is usually adequate |
| Soil | Loose, fertile, well-draining potting mix |
| Pot | A sturdy container with drainage holes |
Rotate the pot occasionally if the leaves lean strongly toward the window. This encourages more balanced growth and helps the plant develop evenly.
Step 5: Feed the Bulb and Rebuild Its Energy Reserves
This is where patience really pays off. A rescued amaryllis needs time to rebuild the energy it spent producing its original flowers.
Once the bulb begins growing leaves and establishing roots, you can feed it with a balanced liquid fertilizer diluted according to the product label. Apply fertilizer to moist soil rather than to completely dry roots.
During active growth, fertilizing every two to four weeks may be appropriate for some products, but always follow the specific label instructions. Too much fertilizer won’t force the bulb to flower sooner and can damage its roots.
Healthy leaves are especially important because they produce energy through photosynthesis. Resist the temptation to cut them off simply because they look untidy. As long as they remain green and healthy, they help the bulb recover.
You can support its recovery by:
- Providing adequate light.
- Watering consistently without saturating the soil.
- Feeding moderately during active growth.
- Keeping the plant away from extreme temperatures.
- Removing only dead or damaged foliage.
The goal isn’t to force another flower stalk immediately. It’s to help the bulb rebuild the resources it needs for long-term survival.
| Check out: How Do I Overwinter Amaryllis Bulbs? |
Step 6: Encourage Future Blooms With a Seasonal Rest Period
If your rescued amaryllis grows well, you may be able to encourage another flowering cycle. However, it may take a full growing season or longer, and some bulbs never bloom again.
Many amaryllis varieties benefit from a rest period before flowering. The exact timing depends on the variety, growing conditions, and the plant’s health.
Once the growing season winds down, gradually reduce watering as the foliage naturally yellows and dies back. Don’t force a weak bulb into dormancy simply because a calendar says it’s time. Allow it to rebuild its strength first.
For bulbs that have matured sufficiently, a cool, dry resting period may help prepare them for another flowering cycle. Many growers keep dormant amaryllis bulbs around 50–55°F (10–13°C), but conditions and timing vary by variety. Avoid freezing temperatures.
When the rest period ends, bring the bulb back into a warm, bright location and resume watering as new growth develops.
Remember that a rescued wax amaryllis may not follow the same predictable schedule as a healthy, established potted bulb. Give it time and watch how it responds.
Common Mistakes to Avoid When Reusing Waxed Amaryllis Bulbs
Even with careful attention, a bulb can fail to recover. Avoiding a few common mistakes can improve its chances.
Removing the wax too aggressively: Scraping or cutting into the bulb can damage living tissue and the basal plate.
Watering too often: Excess moisture is one of the biggest threats to a rootless or recovering bulb. Let the soil partially dry between waterings.
Planting too deeply: Burying the entire bulb increases the risk of moisture collecting around its neck. Keep the upper portion exposed.
Cutting healthy leaves: Green leaves help rebuild stored energy. Removing them prematurely can weaken the bulb.
Expecting immediate flowers: Root growth and energy recovery take time. A healthy-looking leaf doesn’t guarantee that the bulb will flower again.
Ignoring signs of rot: A soft base, foul smell, or widespread mushy tissue suggests that the bulb may be beyond recovery.
Is Reusing a Waxed Amaryllis Worth the Effort?
For me, the answer depends on what I want from the plant. If I simply want beautiful flowers with minimal effort, buying a fresh waxed amaryllis each season is the easier option.
However, if I enjoy gardening and don’t mind experimenting, rescuing a bulb can be a satisfying project. Watching new roots develop and fresh leaves emerge gives the plant a second chance beyond its original decorative purpose.
The important thing is to keep expectations realistic. Waxed amaryllis bulbs aren’t designed for repeated flowering, and recovery may take months or longer. If you want reliable blooms year after year, an untreated amaryllis bulb is usually the better investment.
Final Thoughts
Learning how to reuse waxed amaryllis bulbs after blooming can turn a temporary floral decoration into a rewarding gardening experiment. By removing the wax carefully, checking the bulb’s health, planting it in well-draining soil, and providing steady care, you may encourage it to grow roots and rebuild its energy.
The secret is patience. Don’t rush the process, overwater the soil, or expect another spectacular flower stalk overnight. Give the bulb a suitable environment and let its response guide your next steps.
Even if your first attempt doesn’t succeed, the experience can teach you a lot about bulb care. And if your amaryllis does recover, you’ll have something even more satisfying than its original blooms: a plant that you’ve helped bring back to life.
Clarify Which Bulbs Are Worth SavingAdd a Quick Rescue Checklist