How to Sterilize Seed Starting Mix for Healthy Seedlings

Gardening enthusiasts, rejoice! There’s something undeniably magical about nurturing tiny seeds into vibrant green shoots that blossom into flourishing plants that adorn our living spaces. But here’s the catch: to witness this awe-inspiring transformation, we need to master the art of seed starting mix sterilization. A well-kept secret among seasoned horticulturists, sterilizing your seed starting mix is the key to a bountiful garden.
Picture this: thriving seedlings, standing tall with unwavering vitality, free from the clutches of pesky pests and lurking diseases. The secret lies in the clean canvas we provide them right from the start—a sanitized haven for growth. Are you ready to unlock this gardening treasure trove?
Join us on a journey of discovery as we unveil the secrets of how to sterilize seed starting mix, empowering you to nurture healthy, resilient seedlings like never before. Let’s dig in!
Understanding Seed Starting Mix and Its Importance
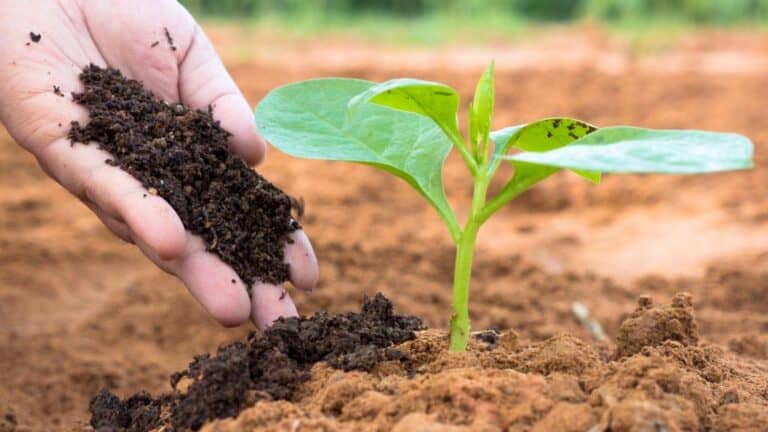
Seed starting mix, often referred to as seed starting medium or seed starting soil, is a specialized blend of materials used to germinate seeds and support early seedling growth. Unlike regular garden soil, which can be too dense and may harbor harmful pathogens, seed starting mix is designed to provide the perfect balance of nutrients, aeration, and moisture retention.
Using sterilized seed starting mix is essential for healthy seedlings. The delicate roots of germinating seeds are highly susceptible to diseases and pests. By starting with a sterilized mix, you create a clean and pathogen-free environment that fosters optimal growth and reduces the risk of seedling loss.
The components of a typical seed starting mix may vary, but they often include a mixture of peat moss, vermiculite, perlite, and sometimes coconut coir. Each ingredient contributes to the mix’s overall structure and water-holding capacity, promoting healthy root development and preventing soil compaction.
Methods for Soil Sterilization

- Heat Sterilization Techniques: Two common heat sterilization methods are the oven and the microwave. Both methods use heat to eliminate harmful organisms without introducing chemicals to soil that might harm seedlings.
- Chemical Sterilization Methods: Chemical sterilizers like bleach or hydrogen peroxide can be used, but they require careful handling to avoid damaging the seeds or seedlings.
- Steam Sterilization Procedures: Steam can be an effective natural sterilization method. It raises the temperature of the mix to kill off pathogens without using chemicals.
- Solarization: Exposing the seed starting mix to direct sunlight is an eco-friendly way to sterilize it. Solarization takes advantage of the sun’s heat to kill off unwanted organisms.
Each sterilization technique has pros and cons. The choice of method will depend on factors such as available resources, the scale of your gardening project, and personal preferences.
Read: How to Sterilize Compost for Healthy Soil
Preparing Seed Starting Mix for Sterilization
Before sterilization, you need to prepare the seed starting mix correctly. Here are the steps to ensure the best results:
- Follow the recipe for your seed starter mix and measure each ingredient accurately. Thoroughly mix the components to create a uniform blend.
- Depending on the plant species you’re cultivating, you may want to add specific amendments like lime or fertilizer to enhance nutrient levels.
- The mix should be damp but not soaking wet. Achieving the right moisture level ensures that seeds have access to the water they need to germinate.
- A consistent mix prevents variations in seedling growth and ensures equal access to nutrients.
- Choose high-quality components to avoid potential contaminants that could hinder seedling development.
How to Sterilize Seed Starting Mix by Oven Sterilization (Step-by-Step Guide)
- Preheating the Oven and Preparing the Containers: Preheat your oven to the recommended temperature. Prepare oven-safe containers with drainage holes to hold the seed starting mix.
- Filling the Containers with Seed Starting Mix: Fill the containers with the mix, leaving some space at the top for expansion during sterilization.
- Placing the Containers in the Oven and Setting the Temperature: Arrange the containers on a baking sheet and place them in the preheated oven. Adjust the oven temperature to the recommended level for sterilization.
- Monitoring the Sterilization Process: Keep a close eye on the containers while they’re in the oven. You may need to adjust the oven temperature if it gets too hot.
- Cooling and Storing the Sterilized Seed Starting Mix: Once the sterilization process is complete, allow the containers to cool before storing the sterilized seed starting mix in a clean and dry location.
Applying Microwave Sterilization to Sterilize Seed Starting Mix
The benefits of microwave soil sterilization reduce the need for chemical treatments, making it an environmentally friendly choice. Plus, it’s a time-saver, with the entire process taking just minutes.
- Preparing Microwave-Safe Containers and Seed Starting Mix: Use containers that are safe to use in the microwave. Fill them with the seed starting mix.
- Determining the Appropriate Microwave Power and Time: Experiment with the microwave’s power settings and timing to find the right combination for effective sterilization.
- Microwaving the Mix in Batches If Necessary: Depending on the quantity of seed starting mix, you may need to sterilize it in several batches to ensure even heat distribution.
- Preventing Overheating and Potential Hazards: Avoid overheating the mix, as it may lead to unintended consequences. Take safety precautions to prevent hazards during microwaving.
- Post-Sterilization Handling and Storage of the Mix: Allow the mix to cool down before handling it. Store the sterilized seed starting mix in a dry and clean container until you’re ready to plant your seeds.
Utilizing Chemical Sterilization Safely and Effectively for Sterilizing Seed Starting Mix
Chemical sterilization can be an effective method for killing off pathogens in your seed starting mix. However, it’s crucial to use the right concentrations of sterilizing agents to avoid damaging the seeds or seedlings. Here’s how to do it safely and effectively:
- Follow the manufacturer’s instructions and recommended dilution rates for the sterilizing agent you choose. Different agents have varying strengths, so precise measurements are vital.
- Dilute the sterilizing agent in water, making sure it’s evenly mixed and safe for use.
- Place the mix in a container and submerge it in the sterilizing solution. Allow it to soak for the recommended time.
- After the sterilization process, rinse the seed starting mix thoroughly to remove any chemical residues that could be harmful to your seeds or seedlings.
- Wear protective gear, such as gloves and goggles, to ensure your safety while handling chemicals. Store sterilizing agents out of reach of children and pets.
Steam Sterilization for Disease Prevention
Steam sterilization is a natural and effective method for killing pathogens in your seed starting mix. It involves exposing the mix to steam, which raises the temperature and eliminates harmful organisms. Here’s how to do it:
- You can use a large pot with a tight-fitting lid or a specialized steam sterilizer. Place a rack or a layer of rocks at the bottom of the pot to lift the containers off the direct heat source.
- Allow the steam to build up inside the pot and reach a temperature of around 212°F (100°C). Steam the seed starting mix for approximately 30 minutes to ensure effective sterilization.
- Keep an eye on the temperature to ensure it remains constant throughout the process. Avoid overheating, as excessive temperatures may damage the mix.
- To avoid waterlogging the mix, make sure the containers have proper drainage holes, and the mix is not overly wet before steam sterilization.
- Steam sterilization is chemical-free and safe for the environment. However, it requires some equipment and may take more time compared to other methods.
Solarization Technique for Natural Sterilization
Solarization is a natural and eco-friendly way to sterilize your seed starting mix. By utilizing the power of the sun, you can effectively kill off pathogens without using chemicals. Here’s how to do it:
- Fill the containers with the seed starting mix and moisten it slightly. Cover the containers with clear plastic or a transparent lid to trap heat.
- Place the containers in a sunny spot with direct sunlight exposure. The solar heat will raise the temperature inside the containers, eliminating harmful organisms.
- Solarization usually takes several weeks to be effective. The duration will depend on your local climate and the intensity of the sunlight.
- Ensure the containers are oriented to receive the maximum sunlight during the day. Adjust their position if needed to make the most of solar heat.
- Solarization works best in warm and sunny climates. If you live in a cooler region, you may need to combine solarization with other sterilization methods.
Table: Sterilization Methods Summary
For a quick overview, here’s a table summarizing the different sterilization methods:
| Method | Temperature/Duration | Pros | Cons |
| Baking | 180-200°F (82-93°C) | Simple, no special equipment needed | Requires an oven |
| Microwaving | 2-3 min per pound | Quick and easy | Small batches only; risk of overheating |
| Boiling | 30 minutes | Cost-effective | Suitable for small batches only |
| Steam | Follow manufacturer’s instructions | Ideal for larger quantities | Requires specific equipment (pressure cooker/steam sterilizer) |
Alternatives to Sterilized Seed Starting Mix
If sterilizing your seed starting mix seems daunting or you prefer ready-to-use options, several alternatives are available. Consider the following options based on your gardening preferences:
- Using Commercially Available Pre-Sterilized Mixes: Many garden centers offer pre-sterilized seed starting mixes that are ready to use. These mixes have undergone quality control measures to ensure they are free from harmful pathogens.
- Homemade Compost-Based Mixes as an Alternative: If you enjoy DIY projects, you can create your own seed starting mix using compost. Compost is rich in nutrients and can provide a healthy environment for seedlings.
- Peat-Free or Coconut Coir-Based Mixes: For eco-conscious gardeners, peat-free or coconut coir-based mixes are viable alternatives. These mixes are renewable and sustainable options.
- Blending Garden Soil with Vermiculite or Perlite: If you have garden soil available, you can enhance its properties by blending it with vermiculite or perlite. These additives improve aeration and water retention.
- Comparing Advantages and Disadvantages of Alternatives: Consider the pros and cons of each alternative before making your decision. Factors such as cost, availability, and environmental impact should be taken into account.
Best Practices for Successful Seed Starting and Transplanting
While sterilizing your seed starting mix is a crucial step, it’s equally important to follow best practices for successful seed starting and transplanting. Here are some tips to ensure your seedlings thrive:
- Selecting Appropriate Seeds for Your Region and Climate: Choose seeds that are well-suited for your specific climate and growing conditions. This ensures better germination rates and stronger seedlings.
- Timing the Seed Starting Process Correctly: Start seeds indoors according to the recommended time frame for your region. Proper timing allows your seedlings to be ready for transplanting at the right time.
- Providing Adequate Light, Warmth, and Moisture for Germination: Place your seedlings in a location with sufficient natural light or use artificial grow lights to provide the necessary warmth and light for healthy growth. Maintain consistent moisture levels to prevent drying out or waterlogging.
- Transplanting Seedlings with Care and Minimizing Transplant Shock: Handle seedlings gently during the transplanting process to avoid damage to the delicate roots. Water the seedlings after transplanting to reduce transplant shock.
- Post-Transplant Care and Nurturing Young Seedlings: Continue to provide proper care and monitoring after transplanting. Regularly water and feed the seedlings to support their growth until they are well-established.
By following these guidelines and employing the right sterilization method for your seed starting mix, you’ll set the stage for a successful gardening journey.
Can I Use Regular Soil Instead of Sterilized Seed Starting Mix?
Thinking of substituting regular soil for sterilized seed starting mix? Think again. While it might seem tempting, using regular soil could spell trouble for your budding seedlings. Here’s why:
- Hidden Hitchhikers: Regular soil can harbor a plethora of unwelcome guests, such as fungi, bacteria, and pests. These hitchhikers can latch onto your delicate seedlings, causing diseases and stunting growth. Sterilized seed starting mix, on the other hand, nips these troubles in the bud.
- Germination Guarantee: When it comes to germination, consistency is key. Sterilized seed starting mix provides a uniform and pathogen-free environment, giving your seeds the best chance to sprout and thrive.
- Nutrient Nirvana: Young seedlings are like little athletes, and they need the right nutrients to flourish. Regular soil might not offer the ideal balance, potentially leading to nutrient deficiencies or imbalances. Sterilized seed starting mix, engineered for optimal nutrition, sets your seedlings up for success.
Check out the table below to see the stark differences:
| Aspect | Regular Soil | Sterilized Seed Starting Mix |
| Pathogen Content | High | Virtually None |
| Consistency for Germination | Unpredictable | Reliable |
| Nutrient Balance | Variable | Optimized |
In a nutshell, when you choose sterilized seed starting mix, you’re making a wise investment in your plants’ future. It’s a surefire way to promote healthy growth, prevent setbacks, and set the stage for a flourishing garden.
Conclusion
Starting your plants from seeds can be incredibly rewarding, but it requires attention to detail and care. By sterilizing your seed starting mix, you give your seeds the best chance to germinate and grow into healthy seedlings.
Preventing fungal diseases in young plants through soil sterilization is akin to creating a fortress against invisible invaders. The risks of using non-sterile soil on young sprouts are undeniable – it’s like inviting trouble into your garden bed.
Our journey through effective ways to kill pathogens in the seedling potting mix has revealed the power of modern techniques like microwave sterilization. This breakthrough not only eliminates harmful microorganisms but also preserves the mix’s nutrient content, striking the perfect balance between safety and nutrition.
As you embark on your gardening endeavors, remember the significance of maintaining cleanliness in the nursery through soil sterility. Like a vigilant guardian, this practice ensures that your plants have the optimal environment to thrive, grow, and eventually grace your garden with their beauty.
So, whether you’re a seasoned horticulturist or a novice with a green thumb in the making, remember: healthy seedlings begin with a sterilized seed starting mix—a small step that yields boundless rewards in the flourishing future of your garden.
FAQs on Seed Starting Mix Preparation for Healthy Plants
What are the best methods to sterilize seed starting mix?
Effective sterilization methods include baking soil (180-200°F for 30 mins), microwaving (2-3 mins per pound), boiling (30 mins), and steam sterilization (follow manufacturer’s instructions). Each method has its advantages, so choose the one that fits your resources and preferences.
How long should I sterilize the seed starting mix in the oven?
Preheat your oven to 180-200°F (82-93°C) and bake the seed starting mix for about 30 minutes. This duration is sufficient to kill pathogens and weed seeds, ensuring a sterilized mix for your seedlings.
Can I reuse seed starting mix after sterilization?
Yes, you can reuse sterilized seed starting mix if it’s in good condition. Remove any plant debris and store it in a clean, dry place. However, avoid reusing mix that has shown signs of disease or poor seedling growth.
Is solarization a reliable method to sterilize the mix?
Yes, solarization can be effective for sterilizing seed starting mix outdoors. Cover moist soil with clear plastic and let the sun’s heat kill pathogens and weed seeds over several weeks.
Are there natural alternatives to chemical sterilization?
Yes, natural alternatives like solarization and using high-quality compost can help sterilize seed starting mix without resorting to chemicals. These methods create a healthier environment for seedlings.
How often should I water seedlings in a sterilized mix?
Water seedlings when the top inch of the soil feels dry. Sterilization doesn’t affect the frequency of watering, as it mainly pertains to eliminating contaminants.
Can I use garden soil for seed starting without sterilization?
Using garden soil without sterilization is not recommended due to the risk of introducing diseases and pests. Opt for a sterilized seed starting mix to ensure your seedlings’ success.