How to Sterilize Soil in Your Microwave for Healthier Plants
Gardening enthusiasts understand the critical role soil plays in nurturing healthy and vibrant plants. However, soil can harbor harmful pathogens and pests that hinder plant growth and vitality.
If you want your plants to reach their full potential, there’s one secret you shouldn’t overlook – the quality of your soil. But fear not, fellow green thumbs, we’ve got the ultimate solution for you – sterilizing soil in your microwave!
Yes, you read that right – the same microwave you use to reheat leftovers can become a powerful tool in your gardening arsenal. It’s a quick, eco-friendly, and surprisingly effective method to banish those pesky plant killers lurking in the soil. From harmful pathogens to relentless weeds, we’ll show you how to bid them farewell and pave the way for healthier, happier plants.
So, if you’re ready to embark on a soil-sterilizing adventure, let’s dive into the world of microwave magic for your garden!
The Basics of Soil Sterilization
Before we dive into the how-to, let’s understand what soil sterilization is all about and why you need to do it. Soil sterilization is the process of eliminating harmful pathogens, pests, and weed seeds from the soil. These undesirable elements can impede plant growth and even lead to disease outbreaks. By sterilizing the soil, you create a clean and safe environment for your plants to thrive.
During the process, various methods can be employed, with microwave sterilization gaining attention due to its simplicity and convenience. Let’s take a closer look at why soil sterilization is important and the benefits it offers your beloved plants.
- Importance of Soil Sterilization: Soil is teeming with life, but not all organisms present are beneficial. Harmful bacteria, fungi, nematodes, and weed seeds can lie dormant in the soil, waiting to pounce on your plants’ roots. Sterilizing the soil helps break this cycle and promotes a healthier growing environment.
- Common Pathogens and Pests in Soil: Soil can harbor a range of threats, including Pythium, Fusarium, and Rhizoctonia, which cause root rot and wilting. Soil-borne insects like grubs and wireworms can also wreak havoc on your plants.
- Benefits of Soil Sterilization: Sterilizing the soil can significantly reduce the risk of disease outbreaks and ensure your plants receive the nutrients they need without competition from weeds. Healthy soil sets the foundation for thriving, disease-resistant plants.
Preparing Soil for Microwave Sterilization
Now that we grasp the significance of soil sterilization, let’s get our hands dirty and prepare the soil for the microwave treatment. Proper preparation is key to achieving successful sterilization.
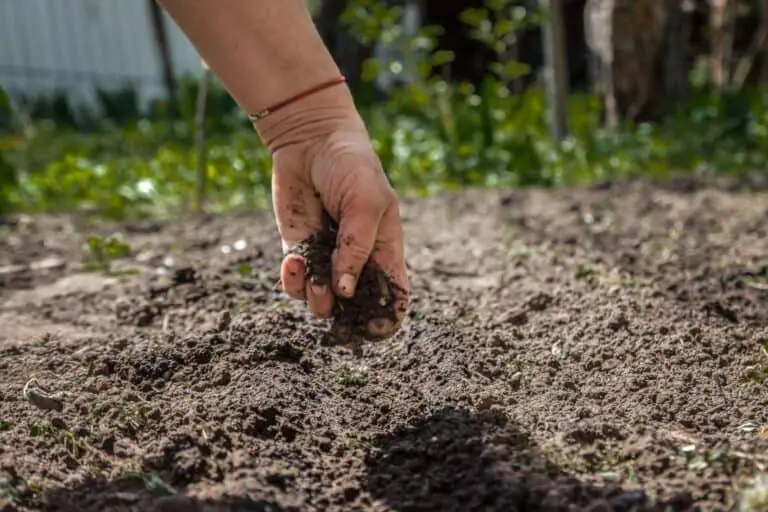
- Soil Selection and Preparation: Start by selecting high-quality, well-draining soil. Avoid using soil from outdoor gardens, as it may contain weed seeds and pests. Opt for a commercial potting mix or sterilized soil from a reputable source.
- Choosing the Right Container for Microwaving: Select a microwave-safe container that is large enough to hold the amount of soil you want to sterilize. A microwave-safe glass or ceramic container with a lid works best.
- Moisture Management for Effective Sterilization: Ensure the soil is slightly moistened before microwaving. Excessively dry soil may not heat evenly, while overly wet soil can create a mess and reduce sterilization effectiveness.
Step-by-Step Guide to Microwaving Soil
Microwave soil sterilization is a safe and effective way to kill unwanted organisms in the soil. It’s also incredibly convenient, especially for small gardening projects or indoor plants.
Now that we have our soil ready, let’s proceed with the microwaving process. Keep in mind that the duration and power settings may vary depending on your microwave’s wattage and the amount of soil you are sterilizing. Here’s a step-by-step guide to help you through the process:
Step 1: Choose the Right Soil
Begin with good quality soil that is free from debris and large particles. Opt for a mix specifically designed for your plants, as this will give them the best chance of success.
WARNING![]()
Avoid using garden soil, as it may contain pests, diseases, or weed seeds that can defeat the purpose of sterilization.
Step 2: Moisture Check
Before microwaving the soil, you need to ensure the right moisture level. Overly dry soil may not heat evenly, while overly wet soil can create steam pockets that might hinder the sterilization process. The ideal moisture level is similar to a wrung-out sponge – slightly damp but not dripping wet.
Step 3: Pick a Microwave-Safe Container
Choose a microwave-safe container large enough to hold the amount of soil you need to sterilize. A microwave-safe plastic or glass container with a lid is ideal. Avoid metal containers, as they can cause sparks and damage your microwave.
Step 4: Fill the Container
Fill the chosen container with the moistened soil, leaving about an inch of space at the top. This space will prevent the soil from spilling over during the heating process.
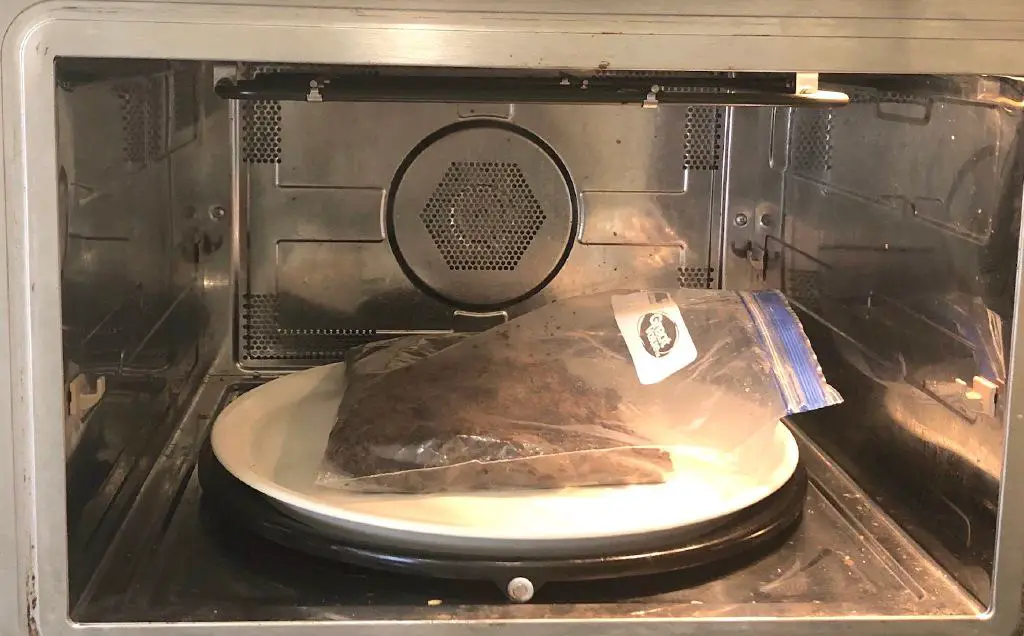
Step 5: Cover the Container
Place the lid on the container, but don’t seal it completely. Leave a small gap to allow steam to escape during the microwaving process. This step is essential to avoid pressure buildup in the container, which can be dangerous.
Step 6: Microwave in Intervals
Now comes the microwaving part. Heat the container on medium power for 2-3 minutes. Then, carefully remove the container from the microwave and give it a gentle stir to distribute the heat. Repeat in 2-3 minute intervals until the entire volume is heated. The total time depends on your microwave’s power and the soil quantity, but it typically takes 10-15 minutes.
This step ensures even heating and helps prevent hot spots.
Step 7: Repeat the Process
Repeat the microwaving and stirring process for 2-3 minute intervals until the entire volume of soil has been heated. The total microwaving time will depend on the quantity of soil and your microwave’s power level, but it typically takes 10-15 minutes.
Step 8: Cool Down
Once the soil is uniformly heated, remove it from the microwave and let it cool down completely before using it for your plants. The container and soil will be hot, so handle them with care and use oven mitts if necessary.
Can I Sterilize Large Amounts of Soil in the Microwave?
The microwave is undoubtedly a handy kitchen appliance, but when it comes to sterilizing large amounts of soil, it might not be the most efficient option. While you can sterilize soil in the microwave, attempting to do so with substantial quantities all at once can lead to uneven heating and incomplete sterilization.
So, to sterilize large amounts of soil and achieve the best results, it’s recommended to break down the process into smaller, manageable batches. This way, you can ensure thorough heating and consistent sterilization throughout.
When you try to sterilize a large amount of soil in a single go, the microwaves may not penetrate evenly, leaving some pockets of the soil insufficiently heated. Incomplete sterilization could potentially lead to the survival of harmful pathogens, weed seeds, or pests that can later affect the health of your plants.
By working with smaller batches, you give the microwaves a better chance to reach all parts of the soil and ensure that any harmful elements are effectively eliminated.
Table: Recommended Soil Sterilization Batches
| Soil Quantity | Recommended Batch Size |
| Large | Divide into smaller batches |
| Medium | Can be divided or microwaved |
| Small | Suitable for microwave use |
Post-Microwave Sterilization Soil Treatment
After completing the sterilization process, it’s essential to handle the soil appropriately and restore its fertility for the best gardening results.
- Cooling Down and Handling the Sterilized Soil: Once the soil has been microwaved or subjected to another sterilization method, allow it to cool before handling. Use oven mitts or a towel to protect your hands from the hot container.
- Reintroducing Beneficial Microorganisms: While sterilization helps eliminate harmful pathogens, it also affects beneficial microorganisms in the soil. After sterilization, consider adding compost or mycorrhizal fungi to reintroduce beneficial microbes and enhance soil health.
- Enhancing Soil Fertility and Structure: Soil sterilization can alter soil structure and nutrient content. To restore fertility, consider adding organic matter, such as well-aged compost or vermicompost, which enriches the soil and improves its structure.
- Adjusting soil pH levels: Sterilization processes can alter the soil pH level, making it either too acidic or too alkaline, which hinders plant growth. Through periodic testing and the addition of lime or sulfur, the soil’s pH can be balanced to create an optimal environment for plant development.
- Implementing Proper Irrigation and Nutrient Management: After sterilization and soil restoration, pay close attention to irrigation and nutrient management. Proper watering is crucial to maintaining the soil’s newfound fertility and ensuring plants receive adequate hydration. Using organic fertilizers and mulches can further enhance soil fertility, sustaining the growth of healthy and vibrant vegetation.
Post-sterilization soil treatment ensures that your soil remains conducive to healthy plant growth and fosters a well-balanced ecosystem beneath the surface.
Read: Is Mushroom Compost Good for Cucumbers?
Tips and Best Practices for Microwaving Soil
Microwaving soil may sound simple, but there are some essential tips and best practices to follow for optimal results:
- Avoid Overheating: Be cautious not to overheat the soil, as it may cause it to become excessively dry and lose essential nutrients. Stick to the recommended intervals and power level for the best results.
- Use a Thermometer: If you want to be precise about the sterilization process, use a soil thermometer to ensure the soil reaches a temperature of at least 180°F (82°C) for effective sterilization.
- Microwave Power Variability: Microwaves vary in power levels, so adjust the microwaving time according to your specific appliance. If you have a lower wattage microwave, you may need to increase the heating intervals slightly.
- Batch Size Matters: For larger quantities of soil, consider microwaving it in smaller batches. This approach ensures thorough heating and sterilization.
- Dispose of Excess Soil Responsibly: If you have leftover soil after your planting project, store it in a sealed container for future use. Alternatively, you can use it as a top dressing for your existing plants.
Factors Affecting Soil Sterilization Results
Achieving successful soil sterilization depends on understanding the factors that can influence the process’s effectiveness. Let’s explore these factors to fine-tune your sterilization approach:
- Soil Composition and Texture: Different soil types have varying levels of moisture retention and heat conductivity. Soil with higher clay content may require adjustments in microwaving time and power to ensure thorough sterilization.
- Effect of Sterilization on Soil Nutrients and pH Levels: Microwaving the soil can affect its nutrient content and pH levels. Prolonged or high-power microwaving may lead to nutrient loss. After sterilization, consider enriching the soil with organic matter and essential nutrients.
- Adjusting Sterilization Methods for Different Plant Types: Some plants may be more sensitive to changes in soil structure and nutrients. Consider the specific needs of your plants when deciding on the sterilization method and duration.
By taking these factors into account, you can tailor your soil sterilization technique to provide optimal conditions for your plants to flourish.
Alternative Soil Sterilization Methods
While microwaving is a convenient and popular choice, other techniques may suit specific gardening needs.
- Steam Sterilization: This method involves using steam to heat the soil and kill pathogens effectively. Steam sterilization is commonly used in commercial operations and is particularly useful for larger quantities of soil. However, it requires specialized equipment and may not be practical for home gardeners.
- Oven Sterilization: Similar to microwaving, oven sterilization involves heating the soil to kill pathogens. While it is effective, it can be more time-consuming and energy-intensive, making it better suited for smaller batches of soil.
- Solarization: A natural and environmentally friendly method, soil solarization uses the sun’s heat to eliminate soil pathogens. Covering moist soil with clear plastic traps the heat, effectively sterilizing the soil over a period of several weeks. This method is particularly beneficial for outdoor gardens and requires no additional equipment.
- Chemical: In some cases, chemical sterilization may be considered. However, this method is generally not recommended for home gardeners due to its potential environmental impact and risks to beneficial soil organisms. It’s mainly used in large-scale agricultural operations where careful application and disposal protocols can be followed to minimize negative effects.
Table below summarizes the key features of each alternative soil sterilization method:
| Soil Sterilization Method | Pros | Cons |
| Steam Sterilization | Efficient and thorosterilize thelization. Ideal for large quantities of soil. | Sterilize thepecialized equipment and may not be practical for home gardeners. |
| Oven Sterilization | Effective for smaller batches of soil. | Time-consuming and energy-intensive. Not practical for large gardens. |
| Solarization | Environmentally friendly and cost-effective. No additional equipment required. | Slower process, takes several weeks to sterilize the soil. Best suited for outdoor gardens. |
By considering these alternative methods, you can choose the one that best fits your gardening setup and ensures the health and success of your plants.
Conclusion
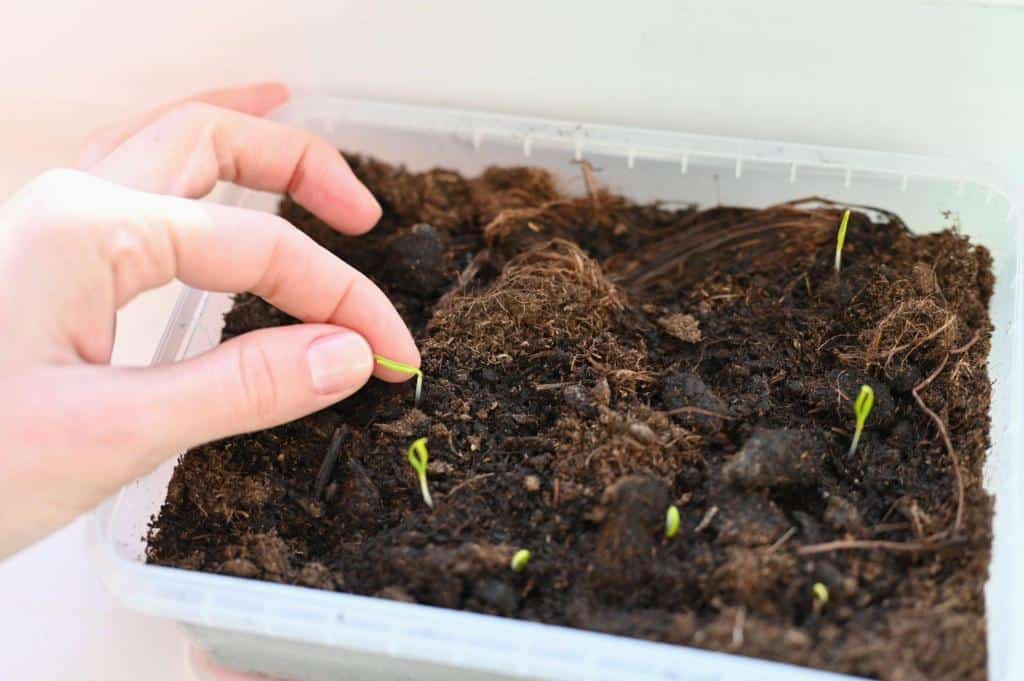
In conclusion, the importance of sterile soil for plant growth cannot be overstated. By eliminating harmful pathogens and weed seeds from the equation, you create a nurturing environment where your plants can thrive and reach their full potential. Microwave-assisted soil disinfection offers a quick, efficient, and environmentally friendly method to achieve sterile soil and prepare a pristine planting medium.
The process of using microwaves to sanitize potting mix is simple and accessible to every gardener. With just a few minutes of microwaving, you can ensure that your soil is free from harmful organisms that could hinder your plants’ growth. The convenience of this technique makes it a game-changer for gardeners looking to optimize their planting medium without resorting to chemical treatments.
So, the next time you prepare your potting mix or planting medium, consider harnessing the power of your microwave to create a sterile haven for your plants. By embracing this innovative method, you pave the way for healthier, more vibrant plants, leading to a bountiful and successful gardening experience. Embrace the practice of sterile planting medium preparation using a microwave, and watch your garden flourish like never before!
By exploring alternative sterilization techniques, considering key factors influencing sterilization results, and adopting post-sterilization soil treatment practices, you can enjoy the rewards of a flourishing garden filled with vibrant, thriving plants. Happy gardening!
FAQs on The Importance of Sterile Soil Using Microwave for Plant Growth
Can you reuse microwaved soil for planting?
Yes, you can reuse microwaved soil for planting. Store any excess soil in a sealed container for future use or use it as a top dressing for existing plants.
Does microwaving soil kill all pests and diseases?
Microwaving significantly reduces pests and diseases, but it may not eliminate them all. Proper soil preparation and sanitation practices can further minimize potential risks.
What temperature kills pathogens in soil?
Soil should reach a temperature of at least 180°F (82°C) for effective pathogen elimination during microwaving.
Is soil sterilization necessary for all plants?
Soil sterilization is not always necessary. It is recommended for starting seeds indoors or when dealing with persistent plant diseases.
Can I use any microwave-safe container for soil sterilization?
Use microwave-safe plastic or glass containers with a lid. Avoid metal containers, as they can cause sparks.
Will microwaving soil affect its pH levels?
Microwaving generally doesn’t impact soil pH levels significantly. However, pH changes may occur over time due to other factors.
How often should I sterilize the soil for my indoor plants?
Sterilize soil before each new planting to maintain a healthy environment for indoor plants.
Can I sterilize garden soil for outdoor use in the microwave?
While possible, sterilizing large amounts of garden soil in the microwave may be impractical. Consider alternative methods for outdoor gardening.
What should I do if my plants still show signs of disease after soil sterilization?
If plants continue to show signs of disease, consider seeking expert advice to identify the problem accurately and explore other plant health management strategies.