How To Plant Carrot From Seed to Harvest (Pot, Raised Bed or Garden Plot)
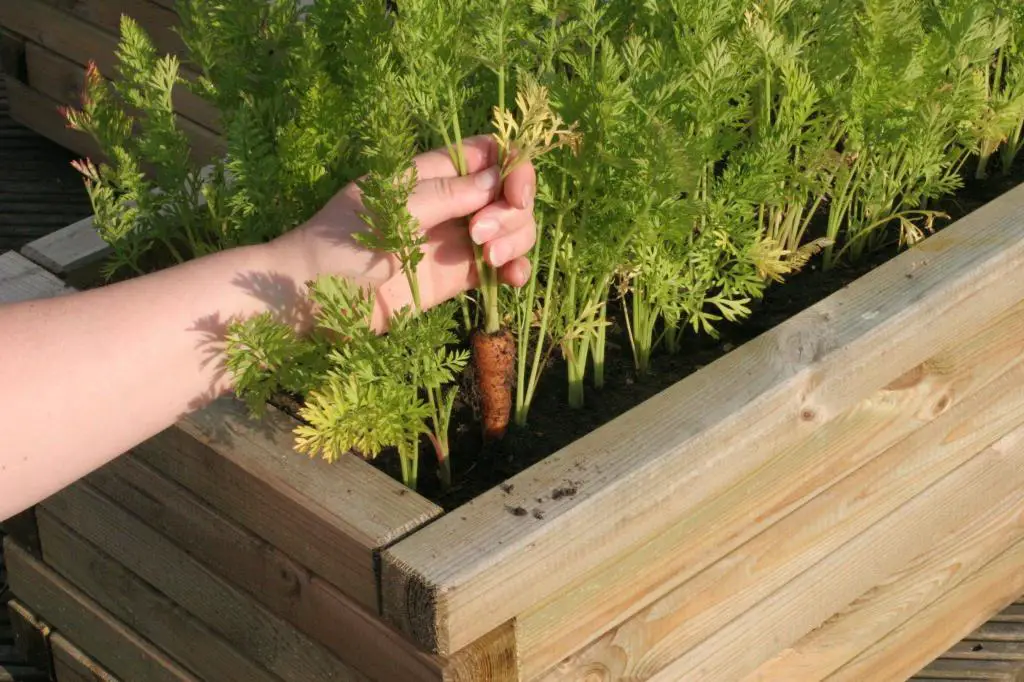
Are you ready to grow your own juicy, crunchy carrots from seed to harvest? Whether you have a small pot, a raised bed, or a garden plot, this guide will show you step-by-step how to plant your carrot, care for, and harvest your own carrots. From choosing the right location to thinning out seedlings and harvesting, we’ve got you covered.
This article will tell you everything you need to know about planting carrots, from the seed to the harvest. We will explain why it is important to understand the different methods of planting and provide solutions for each scenario.
By the end of this article, you will know everything you need to know to grow carrots successfully and get a great harvest. Get ready to add a pop of color and flavor to your meals with your own homegrown carrots!
Overview of Planting Carrot from Seed
Planting carrots from seed is a simple and straightforward process that can be done in pots, raised beds, or garden plots. This guide gives an overview of how to plant carrots from seed, whether you want to grow them for your own use or for a small market garden.
Farmers plant carrot seed at a rate of 1-6 lbs. of carrot seed per acre, depending on what they intend to use their carrot crop for.
Carrots destined to be processed (canned or frozen) get the most space in the field and are planted at a plant density of 180–250 K carrot plants per acre.
If the carrots are grown to be used as “cut-and-peel” carrots, they are planted with the highest plant density, around 1.2 million carrot plants per acre, and require the most seed per acre, 4-6 lbs.
Carrots that are “cut-and-peel” carrots are what we see most often marketed as “baby” carrots. The story about baby carrots is an interesting one.
This article by Seminis, a large commercial seed seller, talks more about commercial carrot seed planting.
Soaking Carrot Seeds In Water
You do not need to soak carrot seeds in water. The point of soaking seeds in water is to increase germination rates and speed up germination. In my experience, it can actually lead to poorer germination rates.
Generally, seeds that have a hard outer shell like beans or corn benefit more from soaking. I personally don’t soak any seeds before planting. Keeping the soil around the seeds moist and warm is the best way to get good germination rates.
A row cover can be used to increase soil temperatures and keep small, tender plants away from pests. Black plastic mulch or other mulch will also increase soil temperatures, but less than clear row covers. These two options on the ground will keep weeds away from the plants but will not provide a physical barrier over the plants.
Should I Water Carrot Seeds After Planting Them?
Most definitely, you should water carrot seeds after planting, until they sprout, and after they sprout! Moisture and temperature are critical to seeds germinating.
The moisture is the catalyst that gets enzymes inside the seed to begin the germination process. It also softens the shell of the seed and mixes with the starch or protein present inside the seed to make a soluble material that the plant can use as nutrition.
The point of watering immediately after planting is twofold: to set the seeds in place where you’ve planted them and to supply moisture to the seeds.
Use room temperature water to water the seeds. Too much water can lead to the seed rotting, so let the soil dry out almost completely before watering again.
Preparing Soil For Planting Carrot Seeds
To prepare soil for carrots, break up the ground 12–18 inches deep. This will ensure that the soil is loose and not compacted, making it easier for the carrot plant to grow and allowing the soil to warm up more quickly. As we talked about in the last section, the temperature of the soil is a big part of figuring out when to plant all garden plants as transplants.
Fertilizing the soil regularly is almost always a necessity to get good yields of fruit and vegetables. Organic Plant Magic is my favorite organic fertilizer. It measures 6-5-5 and has lots of different organic materials, including over 55 trace minerals and 13 different beneficial bacteria strains.
Plant Carrot Seeds in a Starter Tray
Carrots are generally seeded into the garden because they are sensitive to transplanting. If you’re starting them indoors, make sure to use a compostable starter pot that can be transplanted directly into the ground.
Cow Pots and peat pots are compostable pots. Cow pots are environmentally friendly starter pots that are made by a third generation dairy farmer and were featured on an episode of “Dirty Jobs”.
To plant carrot seeds in a starter tray, use a pen or toothpick to make a small hole in each starter pot about 1/4 inch deep. Cover the carrots with dirt and pat them down lightly. Then water the starter tray from the bottom.
To water a starter tray from the bottom, fill the tray with 1/4 inch of water and place the starter pots back in the tray. Wait 20–30 minutes and check on them by touching the potting mix at the top of the pots. When the soil at the top of the pots feels moist, dump out the remaining water in the tray.
Plant Carrot Seeds in a Pot
Step 1. Choose the Right Pot
When planting carrots in pots, it is important to choose the right size and type of pot to ensure success. Consider the following:
- Size: Carrots need depth to grow, so choose a pot that is at least 12 inches deep to give the roots enough space to develop.
- Material: Pots made from materials such as plastic, terra cotta, or wood are suitable for planting carrots.
- Drainage: Make sure the pot has good drainage to prevent the soil from becoming waterlogged and potentially causing root rot.
Step 2. Fill the Pot with Good Quality Soil
Fill the pot with a high-quality soil mixture to give your carrots the best place to grow. This mixture should include the following:
- Potting Soil: Potting soil is light and airy, allowing the roots of the carrots to grow easily.
- Compost: Adding compost to the potting soil helps to improve the soil structure and provide the necessary nutrients for the carrots to grow.
Step 3. Sow the Carrot Seeds
Once the pot is filled with soil, it’s time to sow the carrot seeds.
- Planting Depth: Plant the seeds 1/4 inch deep and 1 inch apart. This will give them enough space to grow without overcrowding.
- Spacing: Space the seeds evenly in the pot to ensure even growth.
Step 4. Water the Seeds Regularly
Watering is essential for the growth of carrots. Keep the soil moist but not waterlogged. Overwatering can cause the seeds to rot.
Step 5. Thin Out the Seedlings
It’s crucial to thin out the seedlings after they’ve emerged. Remove Weaker Seedlings: Remove the weaker seedlings, leaving enough space for the stronger ones to grow. This will make sure that the roots have enough room to grow and that the carrots are healthy.
Step 6. Fertilize the Plants
To promote healthy growth, it is important to fertilize the carrot plants regularly. Use a balanced fertilizer, such as a 10-10-10 mix, and follow the package instructions for application rates.
Step 7. Harvest the Carrots
Harvest the carrots when they are fully grown. This typically takes anywhere from 2 to 4 months from the time the seeds are sown. Pull the carrots gently from the soil and store them in a cool, dry place.
Plant Carrot in a Raised Bed and Garden Plot
Step 1. Choose the Right Location
When planting carrots in a raised bed, it is important to choose the right location for optimal growth. Consider the following:
- Sunlight: Carrots require full sun for at least 6 hours a day, so choose a location that receives adequate sunlight.
- Soil Quality: Carrots grow best in well-drained soil with a neutral pH between 6.0 and 6.8.
- Water Access: Make sure the raised bed has easy access to water, as consistent moisture is important for carrot growth.
Step 2. Prepare the Raised Bed
Before planting the carrots, prepare the raised bed by doing the following:
- Remove Weeds: Clear the raised bed of any weeds, as they will compete with the carrots for nutrients and water.
- Amend the Soil: Add compost to the soil to improve its structure and provide necessary nutrients for the carrots.
- Add Fertilizer: Apply a balanced fertilizer, such as a 10-10-10 mix, following the package instructions for application rates.
Step 3. Sow the Carrot Seeds
Once the raised bed is prepared, it is time to sow the carrot seeds.
- Planting Depth: Plant the seeds 1/4 inch deep and 1 inch apart, giving them enough space to grow without overcrowding.
- Spacing: Space the seeds evenly in the raised bed to ensure even growth.
Step 4. Water the Seeds Regularly
Watering plays a crucial role in the growth and development of carrots. It is important to keep the soil consistently moist, but not soggy, so that the seeds can sprout and the seedlings can grow healthy roots.
One way to ensure the right amount of water is to water the soil deeply, but infrequently. This allows the water to reach the roots and encourages the carrots to develop deep roots, which can help them access water and nutrients as they grow. It is recommended to water once or twice a week, depending on the weather conditions and the soil type.
Step 5. Thin Out the Seedlings
It’s crucial to thin out the seedlings after they’ve emerged. To make room for the stronger seedlings to grow, remove the weaker ones. This will make sure that the roots have enough room to grow and that the carrots are healthy.
Step 6. Fertilize the Plants
To promote healthy growth, it is important to fertilize the carrot plants regularly. Use a balanced fertilizer, such as a 10-10-10 mix, and follow the package instructions for application rates.
Step 7. Harvest the Carrots
Harvest the carrots when they are fully grown. This typically takes anywhere from 2 to 4 months from the time the seeds are sown. Pull the carrots gently from the soil and store them in a cool, dry place.


