When to Plant Ginger in New Zealand: A Guide for Optimal Growth
Ginger is a versatile and aromatic root that has been cherished for its culinary and medicinal properties for centuries. Growing ginger in your garden can be very rewarding. It will give you a fresh supply of this flavorful, healthful spice.
New Zealand’s diverse climate makes it possible to grow ginger successfully with the right knowledge and techniques. This guide will teach you all about planting ginger in New Zealand. It covers the best planting times and key growing tips.
When Should I Plant Ginger in New Zealand?
Ginger can be planted in New Zealand primarily in the spring months, specifically from August to November. This timing allows the plant to benefit from the warmer temperatures that are essential for its growth. The ideal soil temperature for planting ginger is between 20°C and 30°C (68°F to 86°F).
Understanding Ginger’s Growing Requirements
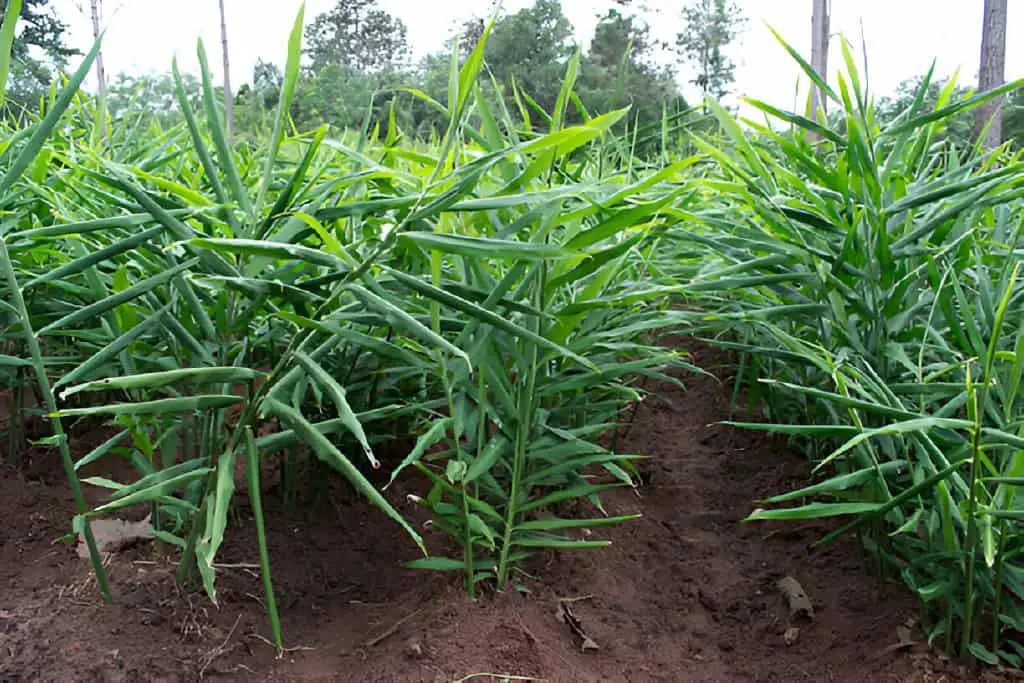
Ginger is a tropical plant that thrives in warm, humid conditions. It requires a long growing season, ample moisture, and rich, well-draining soil to produce healthy rhizomes. Understanding these requirements is crucial to successfully growing ginger in New Zealand.
Ideal Climate and Soil Conditions
- Climate: Ginger grows best in regions with a warm, temperate climate. In New Zealand, this includes areas such as Northland, Auckland, and parts of the Bay of Plenty. These regions offer the prolonged warm temperatures that ginger needs to flourish.
- Soil: Ginger prefers loose, loamy soil that is rich in organic matter. The soil should be well-draining to prevent waterlogging, which can cause rhizome rot. A slightly acidic to neutral pH (5.5 to 6.5) is ideal for ginger cultivation.
Preparing the Soil
Before planting ginger, it’s important to prepare the soil to create an optimal growing environment.
- Testing the Soil: Use a soil test kit to check the pH and nutrient levels of your soil. Adjust the pH if necessary, using lime to raise it or sulfur to lower it.
- Add Organic Matter: Mix compost or well-rotted manure into the soil. This will improve its structure and fertility. This will provide the necessary nutrients and enhance soil drainage.
- Loosening the Soil: Till the soil to a depth of 20-30 cm to ensure good root penetration and drainage.
Choosing the Right Ginger Variety
There are several varieties of ginger, each with unique characteristics. Choosing the right variety for your region and intended use is essential for a successful harvest.
Popular Ginger Varieties in New Zealand
- Common Ginger (Zingiber officinale):
- Use: Culinary and medicinal purposes.
- Characteristics: Mild flavor, widely used in cooking and teas.
- Turmeric (Curcuma longa):
- Use: Culinary spice and medicinal herb.
- Characteristics: Distinctive yellow color, earthy flavor, and numerous health benefits.
- Galangal (Alpinia galanga):
- Use: Culinary, particularly in Asian cuisine.
- Characteristics: Pungent flavor with citrusy notes, used in soups and curries.
Variety Selection Based on Climate
| Variety | Ideal Region | Planting Time | Key Characteristics |
| Common Ginger | Northland, Auckland | Late spring | Mild flavor, versatile culinary uses |
| Turmeric | Bay of Plenty | Early summer | Earthy flavor, bright yellow color |
| Galangal | Northland, Auckland | Late spring | Pungent flavor, popular in Asian cuisine |
Planting Ginger
Selecting and Preparing Seed Rhizomes
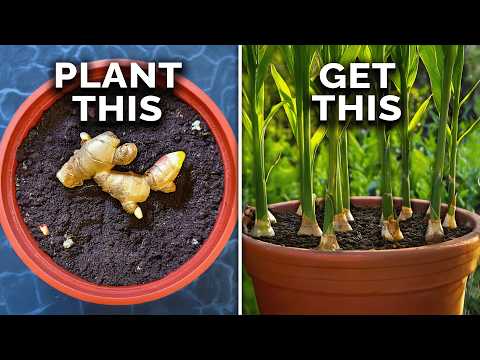
Using healthy, disease-free seed rhizomes is crucial for a successful ginger crop. Purchase seed rhizomes from a reputable supplier or use a piece of fresh ginger from a trusted source.
- Choosing Rhizomes: Select plump, firm rhizomes with visible growth buds (eyes).
- Preparing Rhizomes: Cut the rhizomes into pieces, each with at least one or two eyes. Allow the pieces to dry for a day or two to form a callus, which helps prevent rotting when planted.
Planting Steps
- Planting Depth and Spacing: Plant the ginger pieces 5-10 cm deep and 20-30 cm apart in rows spaced 30–40 cm apart. This spacing allows the plants to grow without overcrowding.
- Watering: Water the soil thoroughly after planting to settle it around the rhizomes. Keep the soil consistently moist but not waterlogged.
Planting Calendar
| Region | Planting Period | Key Considerations |
| Northland | Late spring (October) | Warm soil, ensure adequate moisture |
| Auckland | Late spring (October) | Protect from heavy rains |
| Bay of Plenty | Early summer (November) | Ensure well-draining soil |
Ginger Care and Maintenance
Watering
Ginger requires consistent moisture, especially during the growing season. However, it’s important to avoid waterlogging, which can lead to rhizome rot.
- Frequency: Water deeply once or twice a week, depending on weather conditions. Increase frequency during dry spells.
- Method: Use drip irrigation or soaker hoses to deliver water directly to the soil and roots, minimizing the risk of fungal diseases.
Fertilizing
Ginger is a heavy feeder and benefits from regular fertilization.
- Type: Use a balanced organic fertilizer high in phosphorus and potassium. Fish emulsion or seaweed extract are excellent choices.
- Application: Fertilize at planting and every four to six weeks during the growing season. Apply fertilizer around the base of the plants, avoiding direct contact with the rhizomes.
Mulching
Mulching helps retain soil moisture, suppress weeds, and regulate soil temperature.
- Type: Use organic mulch such as straw, grass clippings, or compost.
- Application: Apply a 5-10 cm layer of mulch around the plants, leaving a small gap around the stems to prevent rot.
Pest and Disease Management
Regular monitoring and preventive measures can help manage pests and diseases in your ginger crop.
Common Pests
- Aphids: Small, sap-sucking insects that can transmit diseases.
- Spider Mites: Tiny pests that cause stippling and yellowing of leaves.
- Root-Knot Nematodes: Microscopic worms that cause galls on roots, leading to stunted growth.
Common Diseases
- Rhizome Rot: Caused by waterlogging and fungal pathogens.
- Leaf Spot: Fungal disease causing brown or yellow spots on leaves.
- Rust: Fungal disease that produces orange pustules on leaves.
Control Methods
- Crop Rotation: Avoid planting ginger in the same spot more than once every three years to prevent soil-borne diseases.
- Companion Planting: Plant ginger with herbs like basil and cilantro to deter pests.
- Organic Sprays: Use neem oil or insecticidal soap for pest control. Copper-based fungicides can help manage fungal diseases.
Harvesting Ginger
When to Harvest
Ginger can be harvested at different stages, depending on your preference. For fresh, tender ginger, you can harvest it as early as four to five months after planting. For mature ginger with a stronger flavor, wait for eight to ten months.
Harvesting Steps
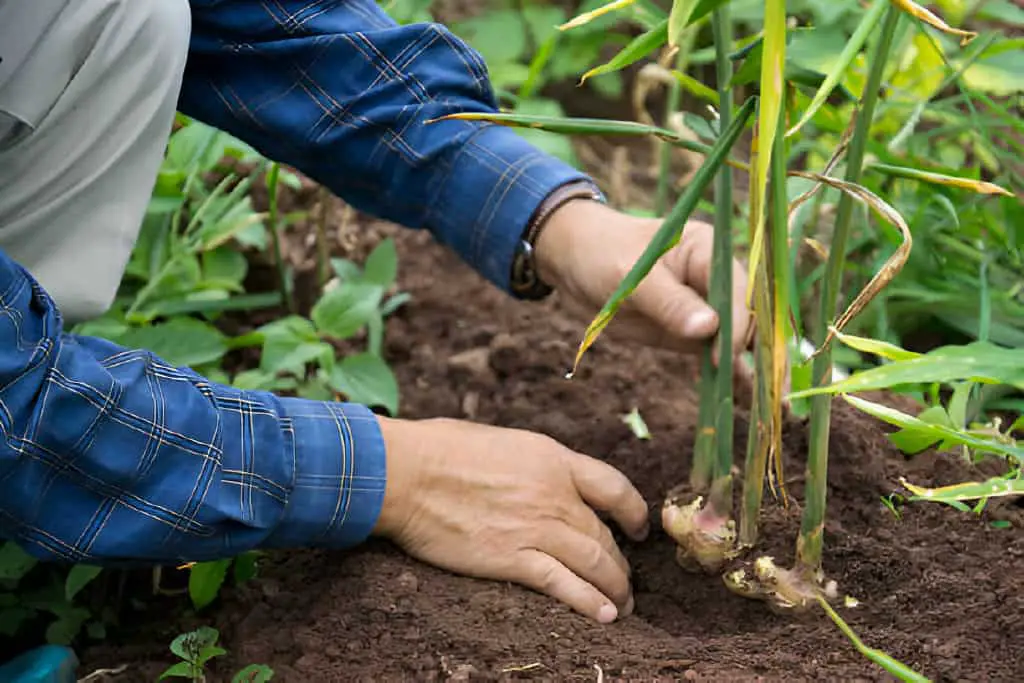
- Check for Readiness: Gently dig around the base of the plants to check the size of the rhizomes. Look for well-developed, plump rhizomes with smooth skin.
- Harvesting: Use a garden fork or spade to carefully lift the plants and collect the rhizomes. Be gentle to avoid damaging the rhizomes.
- Curing: If you plan to store ginger, allow the rhizomes to dry in a warm, shaded area for a few days to cure the skin.
Harvesting Calendar
| Region | Harvesting Period | Key Considerations |
| Northland | February-April | Harvest early for fresh, tender ginger |
| Auckland | February-April | Ensure dry weather for harvesting |
| Bay of Plenty | March-May | Harvest mature rhizomes for a stronger flavor |
Storing Ginger
Proper storage is essential to prolonging the shelf life of your ginger.
Storage Conditions
- Temperature: Store fresh ginger at 13–15 °C in a cool, dry place.
- Humidity: Maintain high humidity to prevent drying out. Store in perforated plastic bags or containers with ventilation.
- Protection: Keep ginger away from direct light to prevent sprouting.
Storage Tips
- Refrigeration: Store fresh ginger in the refrigerator for up to a few weeks. Wrap in a paper towel and place in a plastic bag to maintain humidity.
- Freezing: For long-term storage, freeze ginger in airtight containers. You can grate or slice it before freezing for convenience.
- Drying: Dry ginger by slicing it thinly and air-drying or using a food dehydrator. Store dried ginger in airtight containers in a cool, dark place.
Conclusion
Growing ginger in New Zealand can be a rewarding experience with the right knowledge and preparation. By understanding your region’s climate, choosing suitable varieties, and following best practices for planting, care, and harvesting, you can enjoy a bountiful ginger harvest.
This guide has the steps to grow ginger in both the warm north and the cooler south. It will help your plants thrive and produce flavorful rhizomes for years.
With careful planning, your ginger garden will flourish. It will provide fresh, homegrown ginger for your cooking and medicine.