When and How To Start Brussel Sprouts Seeds Indoors?
Are you a green-thumbed enthusiast eager to grow your own delicious Brussels sprouts? If so, you’re in the right place! One key factor in achieving a successful harvest is knowing when and how to start Brussels sprouts seeds indoors. By mastering the art of seed starting, you can give your sprouts a head start, extend the growing season, and ensure strong and healthy plants.
In this article, we’ll delve into the fascinating world of Brussels sprouts cultivation, exploring the optimal timing and step-by-step process of starting their seeds indoors. Whether you’re a seasoned gardener or just starting out, this comprehensive guide will provide you with the knowledge and confidence to kick-start your Brussels sprouts journey.
So, grab your gardening gloves and let’s dig into the exciting realm of growing Brussels sprouts from seeds indoors!
Overview of Brussel Sprouts and Their Cultivation Process
Brussel sprouts belong to the Brassica oleracea species and are a member of the cabbage family. These miniature cabbage-like vegetables are known for their distinctive flavor and high nutritional value. They thrive in cooler temperatures and require a long growing season, typically taking around 90 to 100 days to reach maturity.
To cultivate Brussel sprouts successfully, you need to understand their cultivation process. Like other brassicas, Brussel sprouts go through a series of growth stages, starting from seed germination to transplanting and eventual harvest. Starting the seeds indoors can give you a head start and increase the chances of a bountiful harvest.
Benefits of Starting Brussel Sprout Seeds Indoors
Starting Brussels sprouts seeds indoors offers several advantages. By giving the seeds a head start indoors, you can extend the growing season and provide optimal conditions for the seedlings to develop. This method allows you to control temperature, moisture, and light levels, resulting in strong and healthy plants.
Additionally, starting seeds indoors allows you to anticipate and overcome any potential challenges, such as adverse weather conditions or pests. Let’s take a look at some of the benefits of starting Brussel Sprouts seeds indoors:
- Early start: By starting the seeds indoors, you can begin the growing process earlier in the year. Doing this will give the plants a longer growing season to reach maturity and produce a plentiful harvest.
- Control over growing conditions: Indoor seed starting allows you to control and maintain optimal conditions for seed germination and early growth, such as temperature, moisture, and lighting. This control helps promote healthy seedlings and minimizes the risk of external factors affecting their development.
- Protection from harsh weather: Starting seeds indoors provides protection from adverse weather conditions, such as late frosts or cold snaps, which can be detrimental to the young seedlings if they were directly sown in the garden.
- Better transplanting success: Seedlings started indoors have a chance to develop strong root systems before being transplanted outdoors. This improves their ability to establish themselves in the garden and increases their chances of thriving.
- Extended harvest season: Starting Brussel sprout seeds indoors allows you to stagger the planting, resulting in a longer harvest season. This ensures a continuous supply of fresh Brussel sprouts throughout the growing season.
Now that we understand the benefits, let’s delve into the specifics of when and how to start Brussel sprout seeds indoors.
Selecting the Right Time for Starting Brussel Sprout Seeds Indoors
Timing is crucial when it comes to starting Brussel sprout seeds indoors. Brussel sprouts require a long growing season, and the goal is to have sturdy seedlings ready for transplanting when the weather and soil conditions are favorable. As a general rule, Brussels sprouts have a long growing season, typically taking 90 to 100 days from transplanting to harvest.
To determine the ideal sowing date for your area, you can work backward from the expected harvest time and consider the following guidelines:
- First frost date: Brussels sprouts thrive in cooler temperatures, so it’s essential to determine the average date of the first frost in your region. You can consult local gardening resources or use online tools to find this information.
- Days to maturity: Check the seed packet or catalog description for the estimated number of days to maturity. This information will help you calculate the ideal starting date for your Brussels sprouts seeds.
- Transplanting date: Brussels sprouts seeds are typically started indoors 4 to 6 weeks before the last expected frost date in your area. This allows the seedlings to grow and develop before they are ready for transplantation. Brussel sprouts can tolerate cold for growing in less than extreme cold conditions.
Once you have these dates in mind, you can count backward to determine the optimal starting date for your Brussels sprouts seeds.
Step-by-Step Guide to Starting Brussels Sprouts Seeds Indoors
Now that you know when to start your Brussels sprouts seeds indoors, let’s delve into the step-by-step process to ensure successful germination and healthy seedlings. Follow these guidelines for a rewarding growing experience:
Materials Needed:
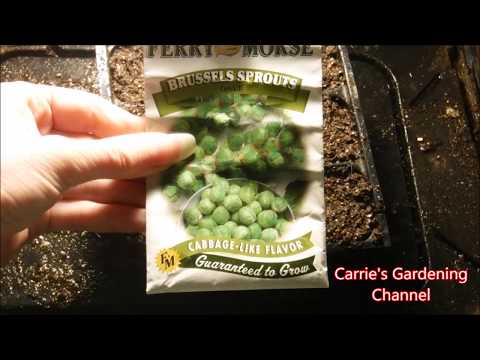
- Brussels sprouts seeds
- Seed-starting trays or pots
- Seed-starting mix
- Spray bottle or watering can
- Transparent plastic cover or plastic wrap
- Grow lights or a sunny windowsill
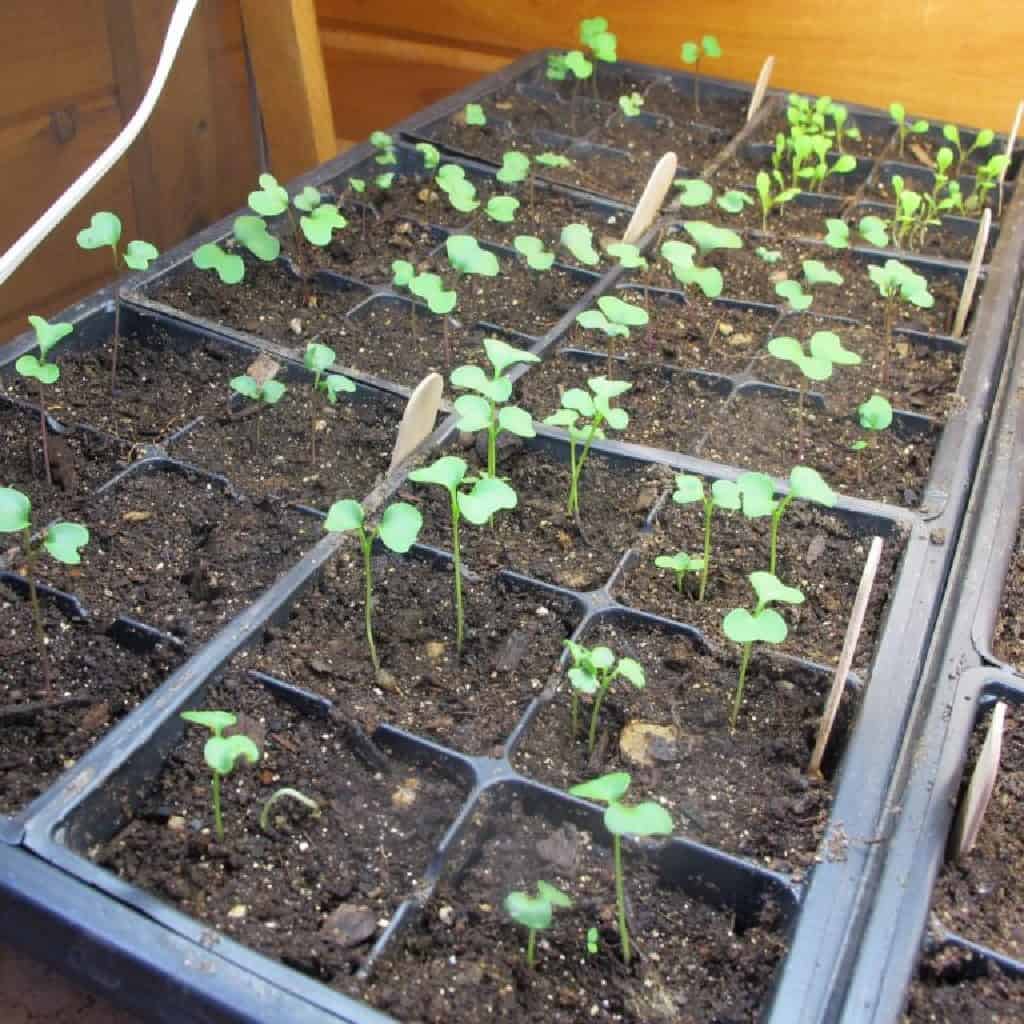
Step 1: Prepare the Containers
Choose seed-starting trays or pots that have drainage holes to prevent waterlogging. Fill the containers with a high-quality seed-starting mix, which provides the ideal balance of nutrients and moisture retention.
Step 2: Sow the Seeds
Sow the Brussels sprouts seeds on the surface of the seed-starting mix, following the spacing recommendations on the seed packet. Gently press the seeds into the mix, ensuring good seed-to-soil contact.
Step 3: Provide Moisture and Cover
Using a spray bottle or watering can, moisten the soil without creating puddles or waterlogged conditions. Cover the containers with a transparent plastic cover or plastic wrap to create a greenhouse-like environment that retains moisture and warmth.
Step 4: Provide Optimal Conditions
Place the containers in a warm location with temperatures between 65°F and 75°F (18°C to 24°C). If necessary, use grow lights to provide consistent and adequate light levels for the seedlings. Alternatively, you can place the containers near a south-facing window that receives ample sunlight. Maintain a consistent temperature and ensure the seedlings receive 12 to 16 hours of light daily.
Step 5: Monitor and Water
Check the containers regularly to ensure the soil remains moist but not waterlogged. Use a spray bottle or watering can to water the seedlings gently, avoiding direct water flow that can dislodge or damage the delicate plants.
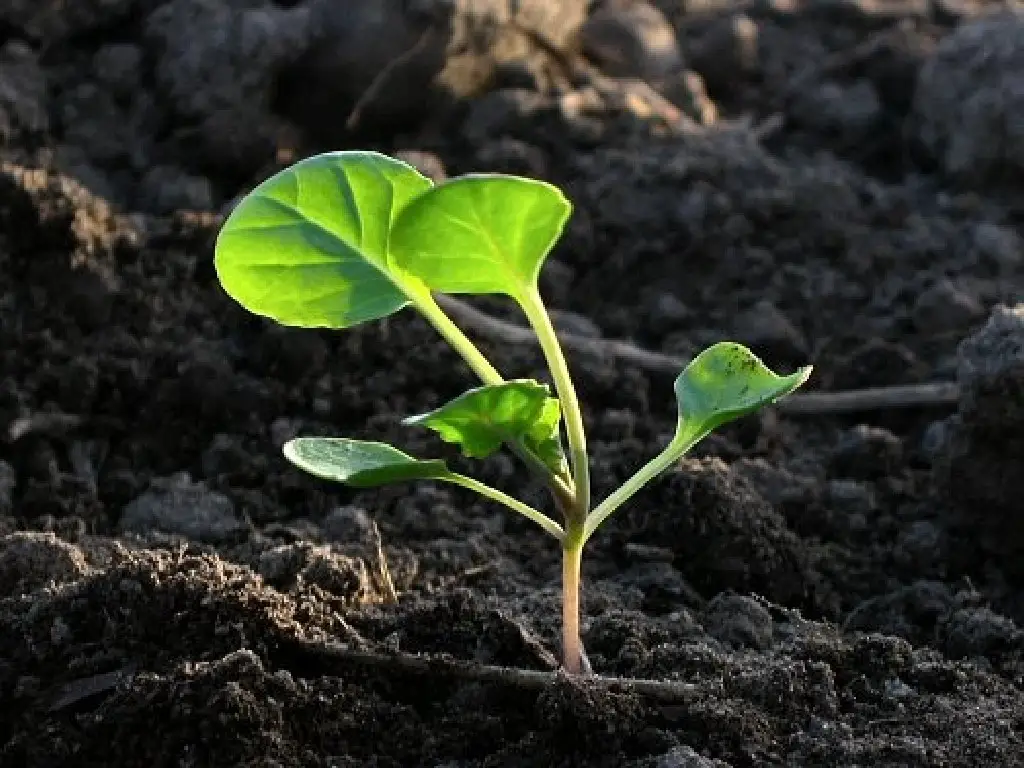
Step 6: Remove Cover and Transplant
Once the seedlings have developed their second set of true leaves and are sturdy enough, it’s time to remove the plastic cover. This transition prepares the seedlings for the outdoor environment. Gradually expose them to outdoor conditions by placing them in a sheltered spot for a few hours each day. Increase the duration gradually over the course of a week.
Step 7: Harden Off and Transplant
Before transplanting the seedlings into the garden, it’s essential to harden them off. This process involves gradually acclimating the seedlings to outdoor conditions to prevent shock. Start by placing the seedlings in a shaded or protected area for a few hours each day, gradually increasing their exposure to direct sunlight and outdoor elements.
Step 8: Transplant into the Garden
Choose a sunny location in your garden with well-drained soil and prepare the planting area by incorporating compost or organic matter. Dig holes slightly larger than the root ball of each seedling. Gently remove the seedlings from their containers, being careful not to disturb the roots, and place them into the prepared holes. Backfill the holes with soil and firm them gently around the base of the plants.
Step 9: Provide Care and Maintenance
Water the transplanted seedlings thoroughly after planting to help them establish in their new environment. Ensure they receive adequate water throughout the growing season, especially during dry spells. Apply a layer of mulch around the plants to conserve moisture, suppress weed growth, and regulate soil temperature. Monitor the plants for pests or diseases and take appropriate measures, such as using organic insecticides or implementing companion planting strategies.
Step 10: Harvest and Enjoy
As the growing season progresses, the Brussels sprouts plants will develop small sprouts along the stalk. Harvest the sprouts from the bottom up as they reach the desired size and firmness. Twist or cut the sprouts off the stalk, leaving the upper sprouts to continue maturing. Freshly harvested Brussels sprouts can be cooked in various delicious ways, adding a flavorful and nutritious touch to your meals.
Caring for Brussel Sprout Seedlings During the Indoor Phase
During the indoor phase, Brussel sprout seedlings require proper care to develop strong, healthy root systems and vigorous growth. Here are some essential tips to follow:
- Lighting: Provide the seedlings with adequate light to prevent them from becoming leggy or weak. If natural light is limited, supplement with fluorescent or LED grow lights positioned 2 to 4 inches above the plants. Aim for 12 to 16 hours of light each day.
- Temperature: Maintain a temperature range of 60°F to 70°F (15°C to 21°C) during the day and slightly cooler temperatures of 55°F to 65°F (13°C to 18°C) at night. Avoid exposing the seedlings to extreme temperature fluctuations.
- Watering: Keep the soil evenly moist but not waterlogged. Water the seedlings from the bottom by placing the containers in a tray of water and allowing the soil to soak up moisture through the drainage holes. Avoid overhead watering, as it can increase the risk of fungal diseases.
- Fertilization: Start fertilizing the seedlings with a balanced liquid fertilizer once they develop their first true leaves. Dilute the fertilizer to half the recommended strength and apply it every two weeks. This will provide the necessary nutrients for healthy growth.
- Air circulation: Good air circulation is essential for preventing diseases and strengthening the seedlings. Use a small fan or open windows periodically to promote airflow around the plants. This helps prevent damping-off and encourages sturdy growth.
- Thinning: If multiple seedlings have germinated in a single container, thin them out by carefully removing the weaker seedlings. This ensures that each plant has enough space and resources to grow properly.
- Transplanting containers: As the seedlings grow, it may become necessary to transplant them into larger containers to provide more space for their roots. Choose containers with drainage holes and use a well-draining potting mix.
Common Challenges and Troubleshooting When Starting Brussel Sprout Seeds Indoors
Starting Brussel sprout seeds indoors can sometimes come with challenges. Here are some common issues and troubleshooting tips:
- Damping-off: This is a fungal disease that can cause seedling death. To prevent damping-off, ensure good air circulation, avoid overwatering, and use a sterile seed-starting mix.
- Leggy seedlings: If your seedlings become tall and spindly, it is a sign of inadequate light. Move them to a brighter location or provide supplemental grow lights.
- Insufficient germination: If your seeds do not germinate well, check the viability of the seeds by performing a germination test before planting. Ensure proper moisture and temperature conditions for germination.
- Pests: Keep an eye out for common pests such as aphids, cabbage worms, or flea beetles. Remove any pests manually or use organic pest control methods.
- Nutrient deficiencies: If the seedlings exhibit yellowing leaves or stunted growth, it may indicate nutrient deficiencies. Consider applying a balanced fertilizer to provide essential nutrients.
Tips for a Successful Transition from Indoor to Outdoor Growth for Brussel Sprouts
To ensure a successful transition for your Brussel sprout seedlings from indoor to outdoor growth, consider the following tips:
- Gradual transition: Avoid abrupt changes in environmental conditions. Gradually expose the seedlings to increasing sunlight, wind, and temperature variations.
- Timing: Wait until the soil has warmed up and the danger of frost has passed before transplanting the seedlings outdoors. Refer to the average last frost date for your region.
- Watering: Provide adequate moisture to the seedlings immediately after transplanting. Monitor soil moisture levels and water as needed to support their establishment.
- Mulching: Apply a layer of organic mulch around the base of the transplanted seedlings. Mulch can kill existing weeds, suppress new weed growth, retain soil moisture, and regulate soil temperature.
- Staking or support: Brussel sprout plants can grow tall and benefit from support as they develop. Consider installing stakes or a trellis system to help brussel sprout grow and prevent the plants from toppling over in strong winds or heavy rain.
- Weed control: Keep the area around the Brussel sprout plants free from weeds, as they can compete for nutrients and water. Regularly remove any weeds that emerge near the plants.
- Pest and disease management: Monitor the plants regularly for signs of pests or diseases. Take appropriate measures to control common pests like aphids or cabbage worms using organic methods, such as handpicking or introducing beneficial insects.
By following these tips, you can ensure a smooth transition and encourage healthy growth for your Brussel sprout plants as they adapt to the outdoor environment.
Conclusion
Starting Brussel sprout seeds indoors allows you to get a head start on the growing season and ensure healthy, thriving plants. By selecting the appropriate timing, providing optimal care during the indoor phase, and gradually transitioning the seedlings to outdoor conditions, you can set the stage for a successful Brussel sprout harvest.
Remember to monitor the plants for any challenges or issues and take prompt action to address them. Enjoy the journey of growing your own delicious Brussel sprouts from seed to harvest!
A successful gardening is often the result of trial and error. Adjust your practices based on your specific growing conditions and learn from your experiences to improve your future
FAQs
Can I start Brussel sprout seeds directly in the garden instead of indoors?
It is possible to sow Brussel sprout seeds directly in the garden. However, starting them indoors gives the plants a head start and increases the chances of a successful harvest.
How long does it take for Brussel sprout seeds to germinate indoors?
Brussel sprout seeds typically take 5 to 10 days to germinate when provided with optimal conditions such as proper temperature and moisture.
Can I reuse the containers and soil for future seed starting?
It is best to use fresh containers and sterile seed-starting mix for each new growing season to prevent the risk of diseases and ensure healthy seedlings.
Do Brussel sprout seedlings need full sunlight indoors?
Brussel sprout seedlings require at least 12 to 16 hours of light each day for healthy growth. If natural light is limited, you can supplement with fluorescent or LED grow lights.
Can I start Brussel sprout seeds indoors in any climate?
Yes, you can start Brussel sprout seeds indoors in any climate. However, the timing for transplanting the seedlings outdoors will vary depending on the local climate and the average date of the last frost.
What is the ideal temperature range for growing Brussel sprout seedlings indoors?
Brussel sprout seedlings thrive in temperatures between 60°F and 70°F (15°C and 21°C) during the day, with slightly cooler temperatures of 55°F to 65°F (13°C to 18°C) at night.
How long should I harden off Brussel sprout seedlings before transplanting them outdoors?
It is recommended to harden off Brussel sprout seedlings for about 7 to 10 days, gradually increasing their exposure to outdoor conditions, before transplanting them into the garden.