What Do You Put on Asparagus Beds? Prepare and Fertilize Your Asparagus
Asparagus, with its tender and flavorful spears, is a perennial favorite in many gardens. Growing asparagus requires a bit of patience and care, but the rewards are well worth the effort.
One of the most crucial aspects of growing healthy asparagus is the preparation and fertilization of the asparagus beds. Have you ever wondered what the secret is to a thriving asparagus bed? Good preparation and fertilization are key. They make sure your asparagus plants are healthy and productive.
In this article, we’ll guide you through the essential steps for preparing and fertilizing your asparagus beds. By reading this, you’ll learn how to make the perfect environment for your asparagus. This will give you strong plants and big harvests. Whether you’re a gardening novice or an experienced grower, these tips will help you cultivate the best asparagus crop possible.
Preparing Asparagus Beds

Before you plant your asparagus, it’s essential to prepare the beds properly. This preparation sets the foundation for healthy plants that can produce for many years. Here’s how to get started:
1. Selecting the Site
Choose a sunny location for your asparagus bed. Asparagus thrives in full sun, requiring at least six to eight hours of sunlight each day. The site should also have well-drained soil to prevent waterlogging, which can lead to root rot.
2. Soil Preparation
Start by testing your soil to determine its pH and nutrient levels. Asparagus prefers a slightly acidic to neutral pH (6.5 to 7.5). You can amend the soil accordingly with lime to raise the pH or sulfur to lower it.
Next, enrich the soil with organic matter. Incorporate a generous amount of compost or well-rotted manure into the top 12 inches of soil. Organic matter improves soil. It helps with structure, drainage, and fertility. This provides a rich environment for asparagus roots to thrive.
3. Bed Formation
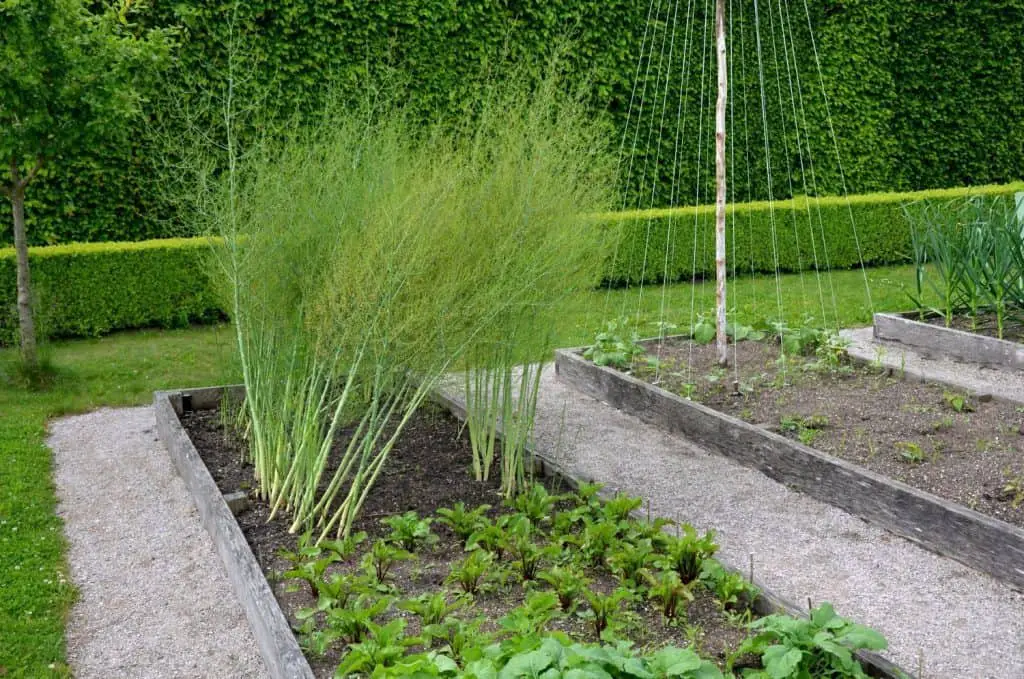
Form raised beds to enhance drainage, especially in areas with heavy clay soils. Raised beds should be about 4 feet wide and as long as you desire. Raised beds also make it easier to manage weeds and pests.
| Read: How to Grow Perfect Asparagus in Raised Beds |
Planting Asparagus
Once your beds are prepared, it’s time to plant the asparagus crowns. Follow these steps to ensure successful planting:
- Trench Preparation: Dig trenches 6 to 8 inches deep and 12 to 18 inches apart. The spacing between trenches allows for adequate root expansion and airflow.
- Planting Crowns: Place the asparagus crowns in the trenches, spacing them 12 to 18 inches apart. Spread the roots out in a star shape to encourage even growth.
- Covering Crowns: Cover the crowns with 2 inches of soil, gradually filling the trench as the plants grow. This method helps support the spears as they emerge and prevents them from becoming spindly.
Fertilizing Asparagus Beds
Fertilizing is a critical component of asparagus care. Proper fertilization ensures the plants get the nutrients they need. It helps them make abundant, healthy spears. Here’s a comprehensive guide to fertilizing your asparagus beds:
Initial Fertilization
After planting the crowns, apply a balanced fertilizer, such as a 10-10-10 formulation, to give the young plants a good start. Follow the manufacturer’s instructions for rates. Too much fertilizer can damage the roots.
| Fertilizer Type | Application Rate | Timing |
| 10-10-10 | Follow package instructions | At planting and early spring |
Annual Fertilization Schedule
- Early Spring: Before the spears start to emerge, apply a balanced fertilizer to boost early growth. A 10-10-10 or similar formulation is ideal. Spread the fertilizer evenly over the bed and lightly work it into the soil.
- After the harvest: In late spring or early summer, apply more balanced fertilizer. This app helps replenish the nutrients used to make spears. It also supports the plant as it stores energy for the next growing season.
| Season | Fertilizer Type | Application Rate | Notes |
| Early Spring | 10-10-10 | Follow package instructions | Boost early growth |
| Post-Harvest | 10-10-10 | Follow package instructions | Replenish nutrients |
Organic Fertilization Options
For those who prefer organic gardening, several options can provide the nutrients for your asparagus beds.
- Compost: Apply a 2-inch layer of compost over the bed in early spring and after harvest. Compost enriches the soil with essential nutrients and improves soil structure.
- Manure: Well-rotted manure is an excellent organic fertilizer. Apply it in the same manner as compost, ensuring it’s well-integrated into the soil.
- Organic Fertilizer Blends: Use commercially available organic fertilizers that are balanced and formulated for vegetables. Follow the instructions for application rates and timing.
Mulching Asparagus Beds
Mulching is an important practice for maintaining healthy asparagus beds. Mulch helps suppress weeds, retain soil moisture, and regulate soil temperature. Here’s how to mulch your asparagus beds effectively:
- Types of Mulch: Use organic mulches such as straw, shredded leaves, or grass clippings. These materials decompose over time, adding organic matter to the soil.
- Application: Apply a 2 to 3-inch layer of mulch over the asparagus bed in early spring. Reapply mulch after the harvest season to maintain its benefits.
- Maintenance: Periodically check the mulch layer and replenish as needed. Avoid piling mulch directly against the asparagus spears to prevent rot.
Watering Asparagus Beds
Proper watering is essential for the health and productivity of your asparagus plants. Asparagus requires consistent moisture, especially during the growing season. Here are some watering tips:
- Frequency: Water asparagus beds deeply once a week, providing about 1 inch of water. Increase frequency during hot, dry periods.
- Method: Use drip irrigation or soaker hoses to deliver water directly to the soil, minimizing water waste and reducing the risk of disease.
- Mulch and Moisture: Mulching helps retain soil moisture, reducing the need for frequent watering.
| Also see: How to Make Asparagus Grow Thicker? |
Common Challenges and Solutions
Growing asparagus can come with its own set of challenges. Here are some common problems and solutions to help you maintain healthy asparagus beds:
Weeds
Weeds compete with asparagus for nutrients and water. Keep the beds weed-free by regularly hand-pulling weeds or using organic mulches to suppress weed growth. Be cautious when weeding to avoid damaging the shallow asparagus roots.
Pests
Asparagus beetles are the most common pest, feeding on spears and ferns. To control them, handpick the beetles and larvae, or use organic insecticides if necessary. Encourage beneficial insects, such as ladybugs, to help manage pest populations.
Diseases
Asparagus is susceptible to diseases like rust and fusarium wilt. Prevent these diseases. Do so by ensuring good air flow. Also, avoid overhead watering. If disease problems persist, rotate crops. Remove and destroy infected plant material to prevent the spread of disease.
Conclusion
Preparing and fertilizing your asparagus beds properly is the key to a successful and bountiful harvest. To enjoy delicious asparagus for many years, select the right site, enrich the soil, and follow a consistent fertilization and maintenance schedule.
Remember to mulch and water appropriately, manage weeds and pests, and address any diseases promptly. With these practices, your asparagus beds will thrive, providing you with a rewarding and tasty addition to your garden.
It can be fulfilling to grow asparagus. It brings fresh, homegrown produce to your table. Whether you’re experienced or a beginner, you can do it. Enjoy the process and the delicious rewards of your efforts!