Growing Kale in Containers Is as Easy as Pie: My Complete Guide to a Thriving Harvest
I love the idea of stepping onto a balcony or patio, snipping a handful of fresh kale, and bringing those crisp green leaves straight into the kitchen. You don’t need a sprawling backyard or a dedicated vegetable patch to make that happen. With the right container, good potting mix, and a little everyday care, you can grow a surprisingly generous supply of kale in pots.
Kale is one of those vegetables that rewards even small-space gardeners. It grows well in containers, produces edible leaves over an extended period, and offers plenty of ways to brighten up everyday meals. I can grow it alongside herbs, tuck it into a sunny corner, or arrange several pots to create a miniature vegetable garden.
The secret isn’t complicated. Give kale enough room for its roots, provide steady moisture and sunlight, and harvest the outer leaves regularly. Here’s how I would grow healthy, productive kale in containers, from choosing the right pots to gathering the first delicious leaves.
How Many Kale Plants Do You Really Need?
Before I start planting, I like to think about how much kale I actually eat. There’s little point filling every available pot with seedlings if a couple of plants would provide enough greens for my household.
As a general guideline, three to four kale plants per person can provide a useful supply if you plan to serve kale regularly. Your actual needs depend on how often you cook with it, how large your plants grow, and how frequently you harvest.
For example, I might start with three plants if I live alone or cook kale occasionally. A family that enjoys kale salads, soups, stir-fries, and smoothies might appreciate a larger container garden.
| Household size | Suggested number of plants | Container arrangement |
| One person | 3–4 | Individual pots or one large planter |
| Two people | 6–8 | Several medium or large planters |
| Four people | 12–16 | Multiple large containers or grow bags |
These numbers serve as a starting point rather than a strict rule. I would rather begin with a manageable number of healthy plants than cram too many seedlings into a single pot. After all, a little breathing room can make the difference between a thriving garden and a jungle of competing leaves.
Choosing the Right Containers
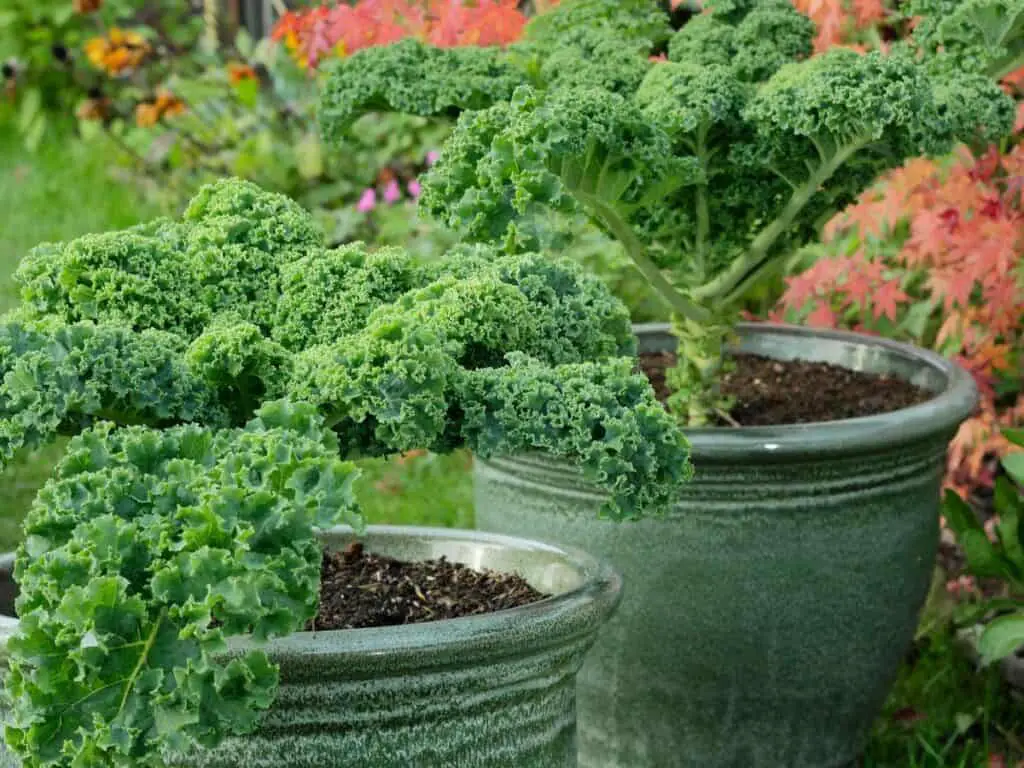
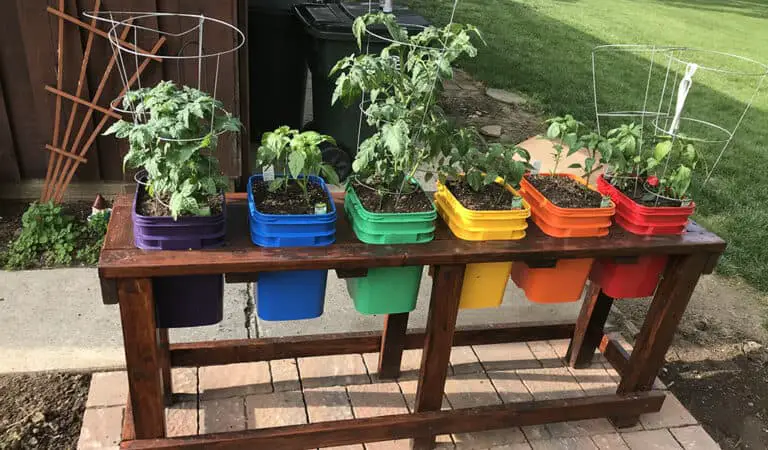
One of the things I appreciate most about growing kale is its flexibility. You don’t need expensive gardening equipment to get started. Almost any clean, food-safe container can work if it provides enough room for the roots and allows excess water to drain away.
Here are some options worth considering:
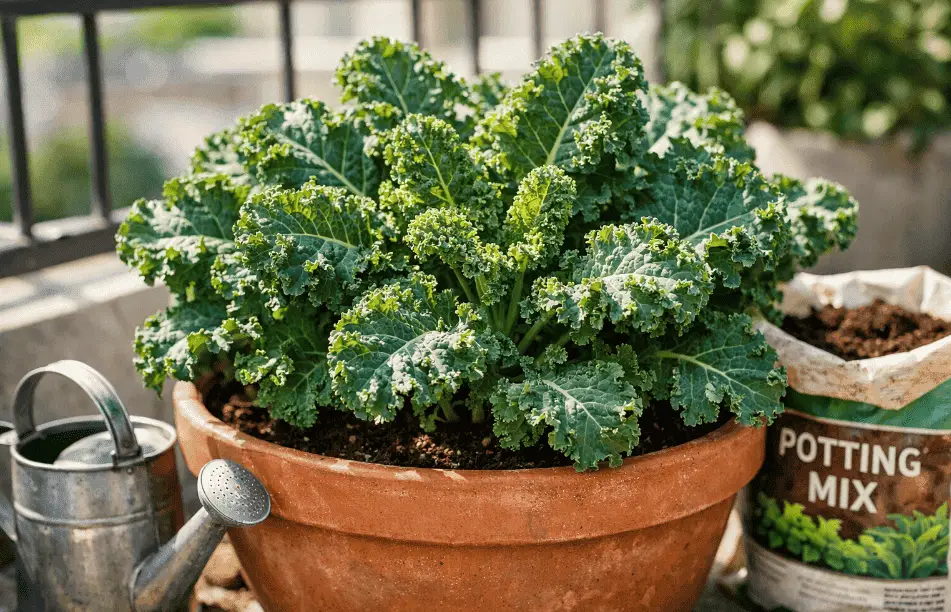
- Clay pots: These offer a classic appearance and allow moisture to evaporate through their porous sides. However, they dry out faster than many plastic containers.
- Plastic planters: Lightweight, affordable, and easy to move when the weather changes.
- Fabric grow bags: These provide good drainage and airflow around the roots, making them useful for patios and balconies.
- Plastic buckets or tubs: Reused food-grade containers can work well after you add drainage holes.
- Large cans: Clean, food-safe cans can serve as compact planters if they have enough room for the roots and no sharp exposed edges.
- Recycled plastic bottles: Large bottles can hold small kale plants temporarily, although larger containers usually make long-term care easier.
- Polypropylene shopping bags: Sturdy reusable bags can work as improvised grow bags if they drain properly and contain no harmful residues.
Whatever I choose, I make drainage my top priority. Water needs an escape route; otherwise, it collects around the roots and encourages rot.
I also avoid containers that previously held chemicals, pesticides, fuel, or other hazardous substances. A cheap pot isn’t a bargain if it puts the food I grow at risk.
How much space does kale need?
A pot about 6 inches (15 cm) across may accommodate a small kale plant, but I prefer a container at least 8–12 inches (20–30 cm) wide for a plant I intend to grow to maturity. A depth of around 8–12 inches also gives the roots more room to develop.
For several plants in one large planter, leave approximately 8–12 inches between them, adjusting the spacing to suit the variety and the container’s size.
Bigger containers also hold more potting mix, which helps the roots access moisture for longer. That little bit of extra space can save you from watering constantly during hot weather.

Choosing the Best Potting Mix
Healthy kale begins beneath the surface. Even the most beautiful container won’t produce impressive leaves if the roots struggle in dense, poorly drained soil.
When growing vegetables in pots, I choose a quality potting mix rather than digging ordinary garden topsoil out of the yard. Garden soil often becomes compacted in containers and may introduce weed seeds or soilborne pests and diseases.
Look for a potting mix formulated for vegetables or edible plants. I want a blend that holds enough moisture to keep the roots comfortable while allowing excess water to drain freely.
A suitable mix generally contains ingredients such as:
- Coco coir or peat moss to retain moisture.
- Compost to contribute organic matter and nutrients.
- Perlite or another lightweight material to improve aeration and drainage.
I don’t usually need to create an elaborate homemade soil recipe. A reliable commercial vegetable potting mix saves time and provides a convenient starting point.
Kale grows best in slightly acidic to neutral soil, with a pH around 5.5–6.8 being a reasonable target. If I mix my own medium, I use a balanced blend that drains well rather than relying on a rigid sand-silt-clay ratio. Heavy mineral soil can become dense in a pot, so a container-specific growing medium is usually the better choice.
Finding the Perfect Spot for Your Kale
Kale needs enough light to produce sturdy stems and healthy leaves. I aim for at least six hours of sunlight daily, although the ideal amount depends on the climate and growing conditions.
In cooler weather, I place my containers in the sunniest available spot. A bright balcony, sunny patio, or well-lit outdoor corner can work beautifully.
When temperatures climb, however, I pay closer attention to the leaves. Kale generally prefers cool weather, and prolonged heat can make growth less vigorous and leaves tougher or more bitter.
Here’s how I adjust the location throughout the growing season:
| Growing conditions | Where I place the container |
| Cool spring weather | A sunny patio or balcony |
| Warm, sunny days | A bright spot with some afternoon shade |
| Hot weather | Partial shade during the hottest hours |
| Cold weather | A sheltered outdoor location, depending on the variety and forecast |
| Indoor growing | Near a bright window or beneath a suitable grow light |
Kale tolerates frost better than many leafy vegetables, but severe cold can damage plants, especially in containers, where roots receive less insulation than they would in the ground. Rather than relying on a single temperature cutoff, I check the variety’s cold tolerance and protect the pot during hard freezes.
If I grow kale indoors, I place it near a bright window or use a grow light to supplement insufficient natural light. A light that sits too far away may leave the plants stretched and weak, so I follow the manufacturer’s recommended distance and lighting schedule.
5. Planting Kale Seeds or Seedlings
I can grow kale from seeds or buy young seedlings from a nursery. Both methods work well, and the choice mostly comes down to how quickly I want to get started.
Starting with seeds
Growing from seed gives me more variety choices and lets me watch the plants develop from the beginning.
Here’s my basic process:
- Fill the container with moistened potting mix, leaving a little room at the top.
- Sow kale seeds about 3 inches (7.5 cm) apart if I plan to thin the seedlings later.
- Cover the seeds with approximately ¼–½ inch (0.6–1.3 cm) of potting mix, following the seed packet’s directions.
- Water gently so the seeds remain moist without washing them out.
- Place the container in a bright location and keep the mix consistently moist while the seeds germinate.
Once the seedlings emerge, I continue providing adequate light and avoid letting the growing medium dry out completely.
Transplanting young seedlings
When planting nursery seedlings, I make a hole large enough to accommodate the root ball. I position each seedling upright and cover its roots with potting mix without burying the leaves.
After planting, I water thoroughly to settle the mix around the roots. I also give newly transplanted kale a little time to adjust before applying strong fertilizer.
Thinning Seedlings for Stronger Growth
When kale seedlings first appear, their earliest leaves are cotyledons, which emerge from the seed and help nourish the young plant. The later leaves, known as true leaves, develop the familiar shape of kale foliage.
If I sow several seeds in one container, I don’t leave every seedling to compete for space. Crowded plants struggle for light, water, and nutrients, so thinning helps the strongest seedlings develop properly.
I wait until the seedlings have developed a few true leaves, then keep the healthiest plants at the recommended spacing. For mature kale in a container, that often means leaving about 8–12 inches between plants, depending on the variety and pot size.
I don’t automatically discard every seedling I remove. If a young plant has a healthy root system and enough room in another container, I may transplant it carefully. Otherwise, tender seedlings can sometimes add a mild, leafy flavor to salads or other dishes, provided they’re clean and suitable for eating.
Caring for Container-Grown Kale
Once the plants settle in, the routine becomes fairly simple. I check the moisture, watch for pests, and feed the plants as needed. Small daily habits keep minor problems from turning into major headaches.
Watering: Keep the Soil Moist, Not Soggy
Kale appreciates consistent moisture, especially when it produces lots of tender leaves. Container soil can dry out quickly in warm, windy conditions, so I never assume yesterday’s watering will carry the plants through today.
I check the top inch of potting mix with my finger. If it feels dry, I water thoroughly until excess water begins to drain from the bottom. If the mix still feels moist, I wait and check again later.
A few useful watering habits include:
- Water near the base of the plant to direct moisture toward the roots.
- Check containers more frequently during hot or windy weather.
- Make sure drainage holes remain clear.
- Avoid leaving pots standing in trays full of water.
- Reduce watering when cool weather slows the soil’s drying rate.
A general garden guideline suggests around 1–1½ inches of water per week, including rainfall. However, containers vary considerably, so I use the soil’s moisture level rather than treating that amount as a strict prescription.
Fertilizing: Give Those Leaves a Helping Hand
Because frequent watering can wash nutrients out of containers, kale may need regular feeding during active growth.
I use a balanced liquid fertilizer formulated for vegetables or an appropriate organic fertilizer. The frequency depends on the product, the potting mix, and the plant’s growth, so I follow the label rather than automatically feeding every seven days.
Too much fertilizer can cause problems, including excessive leafy growth and nutrient imbalances. A steady, moderate feeding routine works better than giving the plants a heavy dose whenever they look unhappy.
If the potting mix already contains fertilizer, I check how long that supply should last before adding more.
Keeping Insects and Other Pests Away
Kale’s tender leaves can attract several unwanted visitors. Caterpillars, aphids, flea beetles, slugs, and snails can all make a meal of the foliage if I let my guard down.
Fortunately, I can protect container-grown kale without turning my balcony into a chemical battlefield.
Use fine mesh to block flying pests
Fine insect-proof mesh or garden netting can keep many moths and butterflies from reaching the leaves and laying eggs. I secure the mesh around the container and support it with hoops if necessary.
Fine bridal tulle may work as a low-cost alternative, although not every fabric has a sufficiently small mesh size. I check the openings carefully before using it, and I leave enough room for the plants to grow.
I also inspect the undersides of leaves regularly. Removing caterpillars and egg clusters early can prevent a small problem from becoming a full-blown invasion.
Manage slugs and snails
Slugs and snails often leave ragged holes in kale leaves, especially in damp conditions.
To reduce their numbers, I:
- Inspect the containers in the evening or early morning.
- Remove hiding places such as wet debris around the pots.
- Avoid keeping the soil constantly waterlogged.
- Use an appropriate slug-control product according to its label if necessary.
I don’t rely on diatomaceous earth as a guaranteed solution because moisture reduces its effectiveness. If I use a pesticide or bait, I choose a product labeled for the intended setting and follow its directions carefully, especially around edible plants, children, and pets.
| Read on: How to Prune Kale Plant (Easy Guide) |
Harvesting Kale for a Continuous Supply
Harvesting is my favorite part because it turns all that watering and tending into something delicious.
Kale leaves are generally ready to pick when they’re large enough to use in the kitchen. Hand-sized leaves provide a convenient guide, although the ideal size depends on the variety and whether I prefer tender baby greens or more substantial leaves.
I harvest from the bottom and work upward, choosing the larger outer leaves first. I use clean scissors or pinch the leaves off carefully near their stems.
The most important rule is to protect the growing point at the center of the plant. I leave the youngest central leaves intact so the plant can continue producing new foliage.
For a healthy, established plant, I usually avoid removing too many leaves at once. Leaving plenty of foliage allows the plant to keep gathering sunlight and replenishing its energy.
My harvesting routine looks like this:
- Choose mature outer leaves that look healthy.
- Remove damaged or yellowing foliage.
- Leave the central growing tip and plenty of healthy leaves.
- Check for insects before bringing the harvest indoors.
- Rinse the leaves thoroughly and store them in the refrigerator.
Regular harvesting encourages a useful supply of fresh greens, although production eventually slows as temperatures rise, plants age, or growing conditions change. In warm climates, I may need to grow kale during the coolest part of the year for the best results.
Final Thoughts: A Small Pot Can Produce a Big Harvest
Growing kale in containers doesn’t require a green thumb, a large budget, or acres of garden space. It takes a suitable pot, a quality growing mix, enough sunlight, consistent watering, and a little attention to pests.
I start with a few plants, learn how quickly my containers dry out, and adjust their position as the weather changes. Once the plants establish themselves, I harvest the outer leaves and leave the central growth untouched.
The beauty of container gardening lies in its flexibility. I can move pots to catch the sun, protect them from harsh weather, and grow fresh vegetables even when space comes at a premium.
Give your kale a comfortable home, and those modest pots may soon become a steady source of crisp, nutritious greens. Before long, you’ll be snipping fresh leaves for salads, soups, sautés, and smoothies—and wondering why you didn’t start your container garden sooner.
Add a quick-start care tableClarify kale spacing and container sizes