Planting Spaghetti Squash from the Store Bought: A Beginner’s Guide
You can grow spaghetti squash from store-bought produce. It can be a fun and rewarding gardening project. Have you ever wondered if those delicious squashes from the supermarket could thrive in your garden?
In this article, we will guide you through the simple steps. You will learn how to grow spaghetti squash from seeds found in store-bought squash. By following our expert advice, you’ll enjoy fresh, home-grown spaghetti squash. It will add a tasty and nutritious part to your meals.
This beginner’s guide will walk you through the steps of planting spaghetti squash from store-bought seeds. It will ensure you have a big harvest.
Understanding Spaghetti Squash
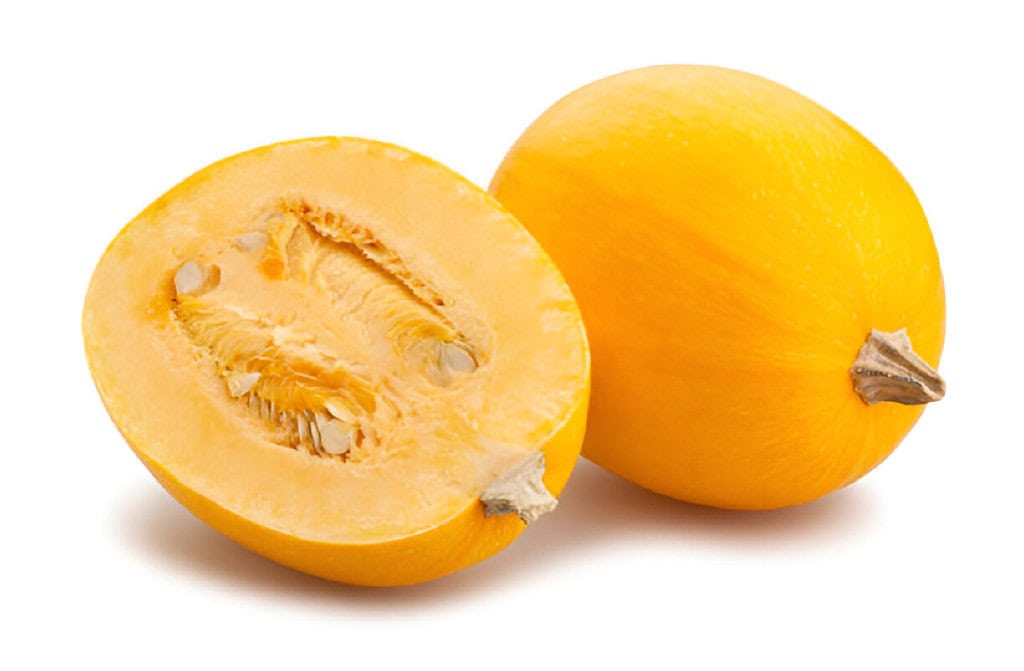
Spaghetti squash, a type of winter squash, is known for its unique flesh that separates into spaghetti-like strands when cooked. This nutritious vegetable is rich in vitamins, minerals, and fiber, making it a healthy addition to any diet. Its mild flavor and versatile texture make it a popular substitute for pasta in various dishes.
Key Characteristics:
- Shape: Oblong, resembling a watermelon.
- Color: Typically yellow or cream.
- Texture: Firm when raw, turning stringy when cooked.
- Nutritional Benefits: Low in calories, high in vitamins A and C, potassium, and fiber.
Choosing the Right Spaghetti Squash from Store Bought to Grow
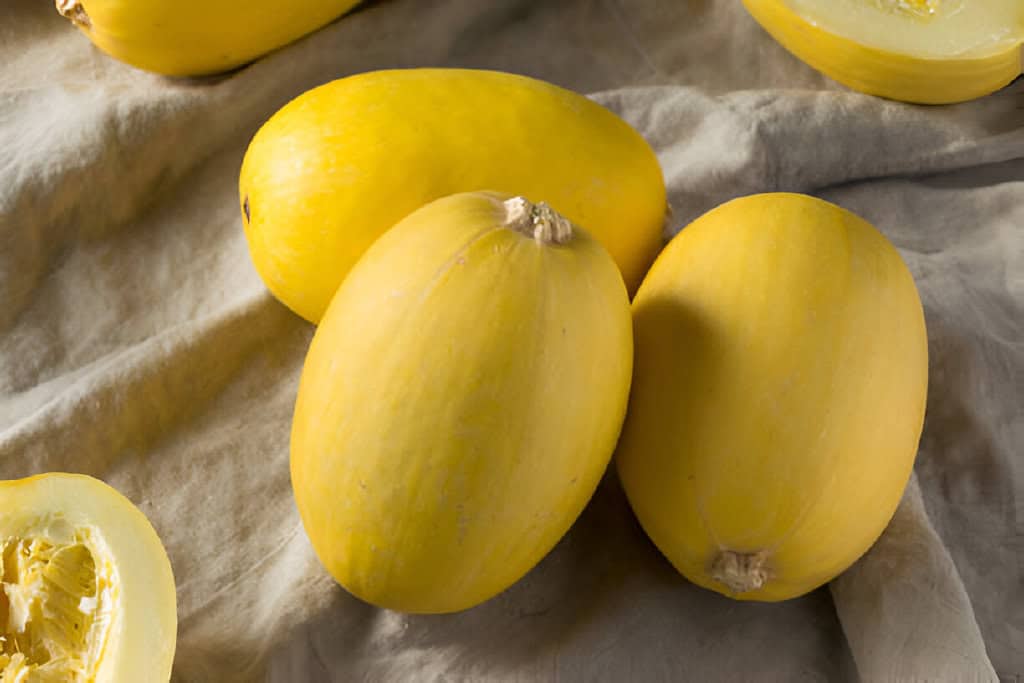
Choosing the right spaghetti squash at the store to grow at home involves many considerations. They ensure a successful gardening experience. To get good seeds, you need some considerations when buying them.
Begin by selecting a healthy squash that shows no signs of damage, mold, or soft spots. Look for a squash that feels heavy for its size, which indicates it is fresh and full of moisture.
Inspect the stem of the squash; a fresh stem indicates the squash was harvested recently. Avoid squash with dried or shriveled stems, as these may not grow well if used for planting. It’s also beneficial to choose organic squash to minimize exposure to pesticides and chemicals that could affect growth.
When storing the squash before planting, keep it in a cool, dry place to maintain its freshness. This prep helps ensure the squash stays good for planting. It also encourages successful germination.
Preparing to Plant Spaghetti Squash
Materials Needed
Before you start planting, gather the following materials:
- Spaghetti squash seeds: You can save seeds from a store-bought squash.
- Seed starting mix: A lightweight, well-draining medium.
- Seed trays or small pots: For starting seeds indoors.
- Compost or organic matter: To enrich the soil.
- Garden tools: Trowel, watering can, and stakes or trellises.
Selecting and Preparing Seeds
- Harvesting Seeds: Cut open a store-bought spaghetti squash and scoop out the seeds. Rinse them under water to remove any flesh and pulp.
- Drying Seeds: Spread the seeds on a paper towel and let them dry for a few days. Ensure they are completely dry to prevent mold.
- Storing Seeds: If you’re not planting soon, store the dry seeds in a cool, dry place. Put them in an airtight container.
Preparing the Garden Bed
- Location: Choose a sunny spot in your garden, as spaghetti squash needs at least 6-8 hours of direct sunlight daily.
- Soil Preparation: Loosen the soil to a depth of about 12 inches and mix in compost or well-rotted manure. Spaghetti squash prefers well-drained, nutrient-rich soil with a pH between 6.0 and 7.5.
- Spacing: Plan for ample space, as spaghetti squash vines can spread widely. Leave about 3-4 feet between planting mounds.
Planting Spaghetti Squash
Starting Seeds Indoors
- Timing: Start seeds indoors 3-4 weeks before the last expected frost date in your area.
- Planting Seeds: Fill seed trays or pots with seed starting mix. Plant seeds about 1 inch deep and water lightly.
- Germination: Keep the soil moist and place the trays in a warm, sunny location. Seeds should germinate in 7-10 days.
Transplanting Seedlings
- Hardening Off: Get the seedlings used to outdoor conditions by placing them outside for a few hours each day. Increase the time over a week.
- Planting Outdoors: Once the frost danger has passed, and the seedlings have at least two true leaves, move them into the prepared garden bed. Plant them in mounds, with 2-3 seedlings per mound, spacing mounds 3-4 feet apart.
- Watering: Water the seedlings thoroughly after planting and maintain consistent moisture.
Direct Sowing
- Timing: In warmer climates, you can sow seeds directly into the garden after the last frost date.
- Planting Seeds: Plant seeds 1 inch deep in prepared mounds, placing 2-3 seeds per mound.
- Thinning: Once seedlings emerge and have a few true leaves, thin them to the strongest seedling per mound.
Caring for Spaghetti Squash Plants
Watering
- Consistency: Keep the soil consistently moist, but not waterlogged. Water deeply once a week, providing about 1-2 inches of water.
- Mulching: Apply mulch around the plants to retain soil moisture and suppress weeds.
Fertilizing
- Initial Feeding: Incorporate compost or a balanced fertilizer into the soil at planting time.
- Side Dressing: Apply a side dressing of compost or a balanced fertilizer when the plants begin to flower and again when the fruits start to develop.
Training and Supporting Vines
- Stakes and Trellises: Use stakes or trellises to support the vines, keeping the fruits off the ground and reducing the risk of rot.
- Pruning: Trim back excessive growth to direct energy toward fruit production.
Pest and Disease Management
- Common Pests: Watch for squash bugs, cucumber beetles, and vine borers. Handpick pests or use organic insecticides as needed.
- Diseases: Prevent fungal diseases by ensuring good air circulation and avoiding overhead watering.
Harvesting Spaghetti Squash
- Timing: Spaghetti squash is ready to harvest when the skin is hard and a rich yellow color. The vines will also begin to wither and die back.
- Harvest Method: Use a sharp knife or pruners to cut the squash from the vine, leaving a few inches of stem attached.
- Curing: Cure the squash by placing it in a warm, dry area for 1-2 weeks. This helps to harden the skin and extend storage life.
Storing and Using Spaghetti Squash
- Storage: Store cured spaghetti squash in a cool, dry place. It can last for several months if properly stored.
- Culinary Uses: Spaghetti squash can be baked, boiled, or microwaved. Once cooked, the flesh can be pulled into strands. It can be used in many dishes, from casseroles to pasta.
Troubleshooting Common Issues Planting Spaghetti Squash
Poor Germination
- Causes: Seeds may be too old or not dried properly.
- Solution: Use fresh, viable seeds and ensure proper drying before planting.
Slow Growth
- Causes: Insufficient sunlight, poor soil nutrition, or inadequate watering.
- Solution: Make sure the plants get 6-8 hours of sun. Add compost to the soil. Keep the soil moist.
Yellowing Leaves
- Causes: Overwatering, nutrient deficiencies, or pest infestations.
- Solution: Adjust watering practices, apply balanced fertilizer, and monitor for pests.
Fruit Rot
- Causes: Excess moisture, poor air circulation, or fruit contact with the soil.
- Solution: Use mulch to keep fruit off the soil. Also, provide enough space for air to circulate and avoid overhead watering.
Advanced Growing Techniques
Succession Planting
To ensure a continuous squash harvest, practice succession planting by sowing new seeds every 2-3 weeks during the growing season. This technique helps you avoid a glut of squash all at once and extends your harvest period.
Companion Planting
Grow spaghetti squash alongside compatible plants to enhance acorn squash growth and deter pests. Good companions include beans, corn, and marigolds. Avoid planting near potatoes, as they can attract similar pests.
Saving Seeds
- Selecting Fruits: Choose the best, most mature fruits for seed saving.
- Harvesting Seeds: Scoop out the seeds, rinse, and dry them thoroughly.
- Storing Seeds: Keep seeds in a cool, dry place for planting in the next season.
Conclusion
Growing spaghetti squash from store-bought seeds is a rewarding and enjoyable gardening project. Follow this beginner’s guide. You can grow healthy plants and enjoy a big harvest of tasty, healthy squash. Remember to pick a sunny spot. Prepare the soil well. Give consistent care all season.
With some effort and attention, you’ll soon be harvesting your own spaghetti squash. You can then enjoy its unique flavor in your favorite dishes. Happy gardening!

