Don’t Let Water Ruin Your Shed! How to Waterproof the Base Like a Pro
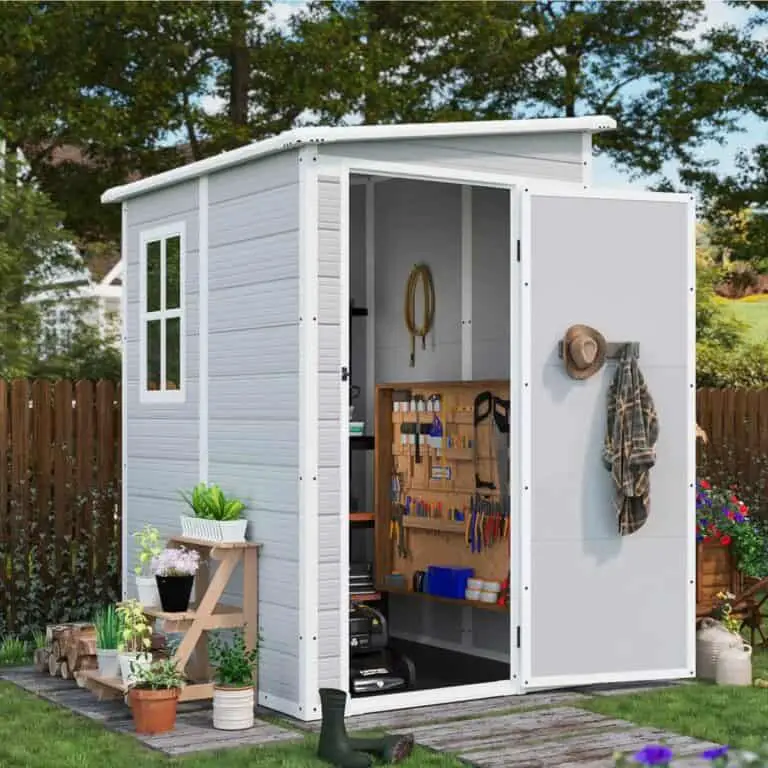
Nothing crushes the excitement of putting up a brand-new shed quite like stepping inside after a rainstorm and finding the floor damp, soft, or—worse—starting to rot. I’ve been there. One wet season was all it took to turn my dream workshop into a moldy mess. That experience taught me one crucial lesson: water is sneaky, and if you don’t waterproof the base of your shed, you’re basically inviting damage right through the door.
So, how do you stop water in its tracks before it seeps into your structure and wreaks havoc? Whether you’re establishing your shed or addressing an existing issue, understanding the correct method for waterproofing the base can significantly improve your situation. Think of it like insurance—only instead of paperwork, it’s gravel, sealants, and smart design.
This post will guide you through practical tips, materials, and step-by-step methods to effectively waterproof your shed base. With these insights, you’ll protect your investment and enjoy a dry, functional shed for years to come.
Why Waterproofing the Base Matters
A shed without a waterproof base is like a boat with a hole in it—it won’t last long. Here’s why it’s essential to keep the foundation dry:
✔ Prevents Rot & Decay – Wood and moisture don’t mix. A wet base leads to rot, which weakens the entire shed.
✔ Stops Mold & Mildew – Moist environments invite mold, which not only smells bad but can cause health problems.
✔ Keeps Stored Items Safe – Whether you’re storing tools, bikes, or gardening gear, water damage is a real threat.
✔ Extends Shed Lifespan – A well-maintained, dry shed lasts years longer than a damp, neglected one.
Now, let’s dive into the best ways to waterproof the base of your shed like a pro.
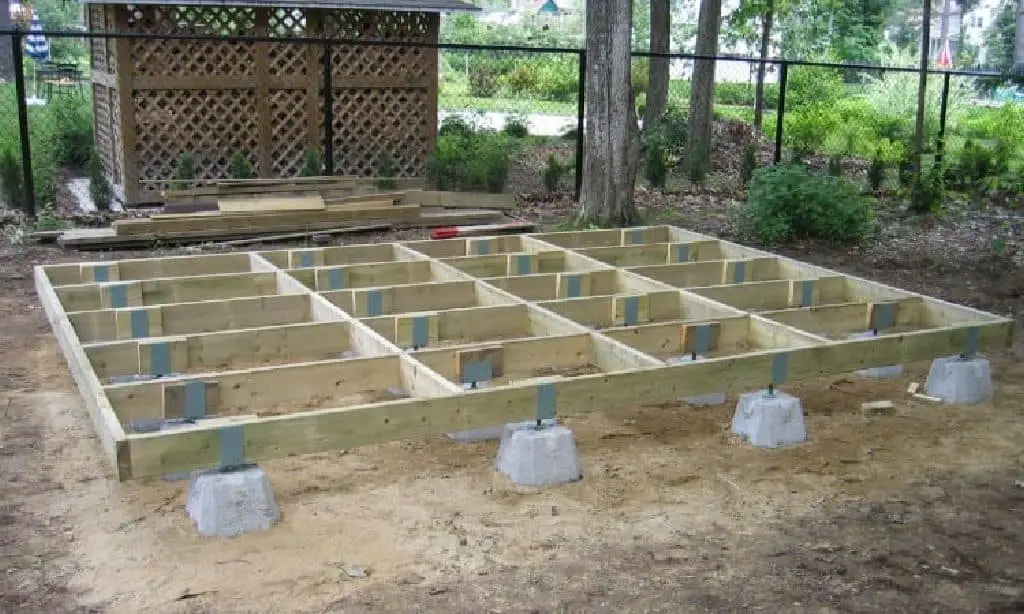
Step 1: Choose the Right Foundation
A solid foundation for your shed is the first step in preventing water damage. Here are the best options:
| Foundation Type | Pros | Cons |
| Concrete Slab | Strong, durable, keeps shed level | Expensive, requires preparation |
| Gravel Pad | Great drainage, prevents moisture buildup | Needs a frame to contain gravel |
| Paver Base | Good drainage, easy to install | Can shift over time |
| Pressure-Treated Wood Frame | Elevates shed, protects from ground moisture | Requires maintenance, potential for rot |
Pro Tip: If you’re building a new shed, raise the shed at least 4-6 inches above ground level to prevent water pooling.
Step 2: Use a Waterproof Barrier
Adding a moisture barrier between the ground and your shed floor is like putting on rain boots before stepping into a puddle—it keeps water out.
Best Waterproof Barriers:
- Heavy-duty plastic sheeting – A simple, cost-effective way to block moisture from seeping up.
- Rubber membranes – More durable than plastic and provides excellent protection.
- Roofing felt – Creates a water-resistant layer under your shed base.
- Vapor barrier tape – Seals gaps to prevent moisture from sneaking through.
To install, lay the barrier directly on your foundation before placing the shed. If using gravel, put the barrier between the gravel and the shed floor.
Step 3: Seal the Shed Floor
Even with a strong foundation, you need to protect the actual floor of your shed.
✔ Apply a Waterproof Sealant – Use a high-quality wood sealant or deck stain to create a water-resistant layer.
✔ Use Epoxy Coating – This adds an extra layer of protection, especially useful for sheds storing heavy equipment.
✔ Install Vinyl Flooring – Not only waterproof but also easy to clean.
✔ Caulk the Gaps – Sealing seams and edges prevents water from sneaking in.
Pro Tip: Reapply sealant every couple of years for maximum protection.
| Related: How Do You Keep the Bottom of a Backyard Shed from Rotting? |
Step 4: Improve Drainage Around the Shed
Water pooling around your shed is like leaving a sponge in a sink—it will soak up moisture fast. Proper drainage keeps the base dry.
Ways to Improve Drainage:
- Install a Gravel Trench – Dig a shallow trench around the shed and fill it with gravel to help water drain away.
- Use Gutters & Downspouts – Direct rainwater away from the shed base.
- Grade the Ground – Slope the surrounding area so water flows away instead of pooling under your shed.
- Install French Drains – If you have severe drainage issues, a French drain can divert water from your shed.
Pro Tip: Keep at least 12 inches of clearance around the shed free from plants and debris to allow proper air circulation and drying.
Step 5: Elevate the Shed if Necessary
If you live in an area with heavy rain or flooding, raising your shed can be a game-changer.
✔ Use Concrete Blocks or Piers – Lifting the shed a few inches off the ground keeps moisture away. ✔ Build on Skids – Wooden skids allow airflow and prevent water buildup under the shed. ✔ Install Adjustable Shed Feet – These keep the shed level while elevating it above damp ground.
Step 6: Maintain & Inspect Regularly
Waterproofing isn’t a one-and-done deal—it requires upkeep.
- Check for Water Damage – Look for soft spots, discoloration, or mold.
- Reapply Sealant – Every 2-3 years, refresh the protective coating.
- Clear Debris – Keep leaves, dirt, and moisture-trapping materials away.
- Inspect Drainage – Ensure gutters and trenches remain functional.
| Read: What’s the Best Material for Outdoor Sheds? Wood, Metal, or Plastic? |
FAQs on Waterproofing Shed’s Base like a Pro
1. What materials are best for waterproofing a shed base?
For effective waterproofing, choose durable materials like rubber membranes, waterproof sealant, pressure-treated wood, and gravel. These materials help create a barrier between the shed base and ground moisture, increasing shed durability.
2. Can I waterproof an existing shed base, or is it only for new builds?
Yes, you can waterproof an existing shed base. Clean the area, seal cracks with waterproof sealant, and apply a membrane or raised platform to protect against moisture seepage.
3. How often should I check the waterproofing on my shed base?
Inspect your shed base every 6–12 months. Look for signs of wear like water stains, mildew, or soft spots. Regular checks help you maintain effective waterproofing and prevent long-term damage.
4. What’s the role of shed placement in waterproofing the base?
Location matters. Place the shed on high ground with natural drainage. Avoid low-lying areas prone to pooling, as good positioning enhances your base’s waterproofing success.
5. Is a concrete slab the best option for a waterproof shed foundation?
A concrete slab provides excellent stability and water resistance when combined with a vapor barrier and sealant. It’s one of the most professional ways to waterproof the base of a shed.
Final Verdict: A Dry Shed is a Happy Shed
Waterproofing the base of your shed is an investment in its longevity. You can keep your shed in top condition for years by starting with a solid foundation, adding barriers, sealing the floor, improving drainage, and performing regular maintenance.
Remember: ✅ Elevate the shed to keep water away. ✅ Use waterproof barriers to block moisture. ✅ Seal and coat the floor for extra protection. ✅ Improve drainage so water doesn’t pool around the shed. ✅ Inspect and maintain regularly to catch problems early.
With these steps, you’ll ensure your shed remains dry and sturdy, regardless of what the weather throws at it. Now go out there and waterproof like a pro!