How to Trim Wallflower Plant: In-depth Pruning Guide
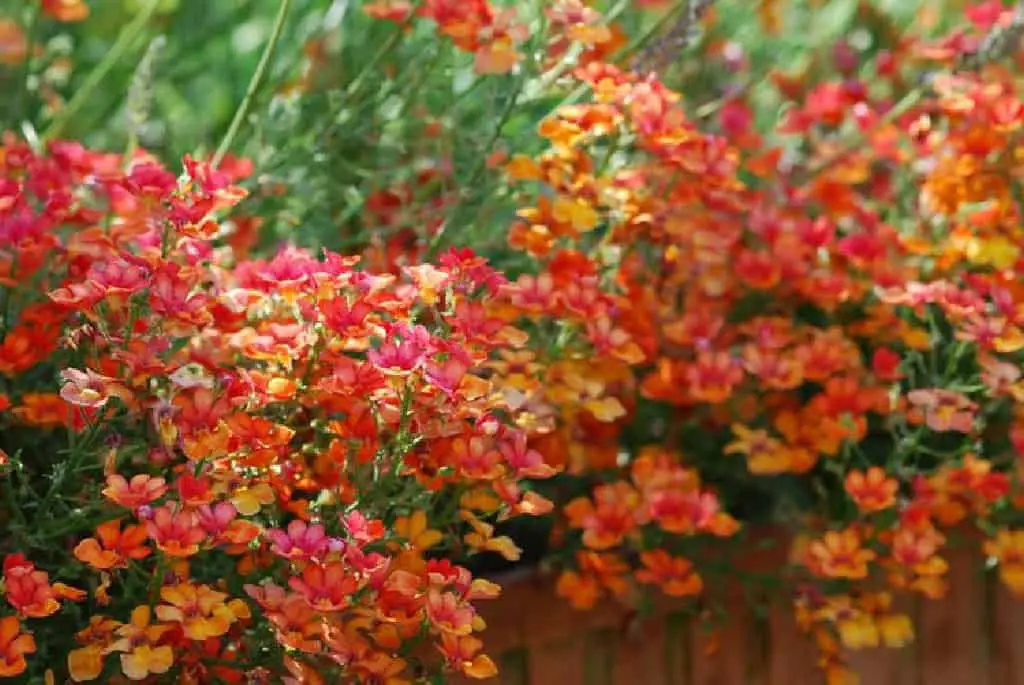
Wallflowers, with their vibrant blooms and delicate fragrance, can bring charm to any garden. Knowing when and how to prune them is essential for maintaining their health and enhancing their beauty.
Have you ever wondered how to prune wallflower plants to ensure they thrive year after year? Knowing the best pruning techniques can greatly affect their growth. It also impacts their blooming cycle.
This article is about the art of pruning wallflowers. It covers when to prune, the tools you’ll need, and the benefits of pruning. Whether you’re a seasoned gardener or just starting out. Mastering these techniques will help you grow a flourishing garden.
Understanding Wallflower Plants
Wallflowers, with their vibrant blooms and sweet fragrance, are a delightful addition to any garden. These hardy plants, known scientifically as Erysimum, thrive in various climates and bring a splash of color to your outdoor space.
Wallflowers are a diverse group of plants that belong to the Brassicaceae family. They are known for their long-lasting flowers, that come in various shades of yellow, orange, red, and purple.
Wallflowers are biennials or short-lived perennials, meaning they complete their lifecycle in two years or may persist for a few years under favorable conditions. People particularly like these plants for their early spring blooms. The blooms bring needed color after winter.
Benefits of Pruning Wallflowers Plants
Pruning wallflowers offers numerous benefits, including:
- Encourages new growth and prolongs the blooming period.
- Helps maintain a neat and compact shape.
- Prevents the plant from becoming leggy or overgrown.
- Removes dead or diseased parts, reducing the risk of pests and diseases.
When to Prune Wallflowers
Timing is crucial when it comes to pruning wallflowers. The ideal time to prune wallflowers is after the first flush of blooms in late spring or early summer. This encourages the plant to produce more flowers and prevents it from becoming too leggy. Additionally, light pruning can be done in early spring to remove any winter damage and prepare the plant for the growing season.
Seasonal Pruning Guide
Spring:
- Remove any dead or damaged stems from winter.
- Lightly shape the plant to encourage new growth.
Summer:
- Perform major pruning after the first bloom.
- Cut back spent flower stems to promote a second flowering.
Fall:
- Remove any remaining spent flowers.
- Avoid heavy pruning as the plant prepares for dormancy.
Winter:
- Minimal pruning, focusing only on removing damaged parts.
Table: Seasonal Pruning Activities for Wallflowers
| Season | Pruning Activity |
| Spring | Remove winter damage, light shaping |
| Summer | Major pruning after first bloom, deadheading |
| Fall | Remove spent flowers, avoid heavy pruning |
| Winter | Minimal pruning, removing damaged parts |
| Read: Trimming Aralia Plant |
Tools and Preparation
Proper preparation and the right tools are essential for effective pruning. Using clean, sharp tools helps make precise cuts and minimizes the risk of disease transmission.
Essential Tools
- Pruning Shears: Ideal for cutting small stems and leaves.
- Loppers: Useful for thicker branches.
- Gloves: Protect your hands from thorns and sap.
- Disinfectant: Clean your tools before and after use to prevent disease spread.
Table: Pruning Tools for Wallflowers
| Tool | Use |
| Pruning Shears | Cutting small stems and leaves |
| Loppers | Trimming thicker branches |
| Gloves | Protecting hands from thorns and sap |
| Disinfectant | Cleaning tools to prevent disease spread |
Pruning Wallflower Plants: Step-by-Step Guide
1. Inspect the Plant
Before you start pruning, thoroughly inspect your wallflower plant. Look for any dead, diseased, or damaged stems. Identifying these areas helps you determine where to make your cuts.
2. Remove Dead and Diseased Parts
Begin by removing any dead or diseased stems and leaves. Use your pruning shears to make clean cuts just above a healthy part of the stem. This prevents the spread of disease and encourages new, healthy growth.
3. Trim Overgrown Stems
If your wallflower plant has become leggy or overgrown, trim back the longer stems. Aim to cut back the stems by about one-third, making your cuts just above a leaf node. This encourages the plant to become bushier and promotes new growth.
4. Shape the Plant
Once you’ve removed the dead and overgrown parts, shape the plant to your desired form. This might involve trimming back any straggly or unruly stems to create a more compact and attractive appearance. Use your loppers for thicker branches and pruning shears for smaller ones.
5. Clean Up
After pruning, clean up any fallen leaves and debris around the base of the plant. This helps prevent pests and diseases. Give your wallflower a thorough watering to help it recover from the trimming process.
Pruning Tips for Healthy Growth of Wallflower Erysimum Plan
- Regular Maintenance: Perform light pruning regularly to maintain the plant’s shape and health.
- Avoid Over-pruning: Only remove up to one-third of the plant at a time to avoid stressing it.
- Watch for Pests: Keep an eye out for common pests like aphids or spider mites, which can be attracted to newly pruned plants.
- Fertilize: After pruning, feed your wallflower with balanced fertilizer. This will promote new growth.
Troubleshooting Common Pruning Issues
- Browning Tips: If you notice browning tips after pruning, it could be due to excessive pruning or improper cuts. Ensure your tools are clean and sharp, and avoid cutting too much at once.
- Slow Growth: If your wallflower is not growing as expected after pruning, check the soil and light conditions. Wallflowers prefer well-draining soil and full sun to partial shade.
Table: Common Pruning Issues and Solutions
| Issue | Cause | Solution |
| Browning Tips | Excessive pruning or improper cuts | Use clean, sharp tools; avoid over-pruning |
| Slow Growth | Poor soil or light conditions | Ensure well-draining soil and adequate light |
| Read: Prunning Alyssum Plant |
Benefits of Proper Pruning
Pruning wallflower plants correctly can lead to numerous benefits. It encourages the development of more flowers, enhances the plant’s overall health, and keeps the plant looking neat and tidy. Proper pruning also helps stop disease and pests. It ensures your wallflower thrives for many years.
Encouraging More Blooms
One of the primary reasons to prune wallflowers is to encourage more blooms. By removing spent flowers and trimming back overgrown stems, you stimulate the plant to produce new buds. This results in a more prolific flowering season, allowing you to enjoy the vibrant blooms for an extended period of time.
Improving Air Circulation
Dense growth can limit airflow around the plant, creating a humid environment that encourages diseases and pests. Pruning thins out the plant. It improves air flow and cuts the risk of fungi and pests.
Maintaining Plant Health
Regular pruning removes dead or diseased branches, preventing the spread of infections to healthy parts of the plant. It also allows you to inspect the plant closely, catching any potential issues early and addressing them promptly.
Shaping and Controlling Growth
Wallflower plants can grow rapidly, becoming unruly if not managed properly. Pruning helps control their size and shape, ensuring they fit well within your garden design. This is key for wallflowers in mixed borders. They can easily overshadow smaller plants.
Table: Benefits of Pruning Wallflowers
| Benefit | Description |
| More Blooms | Stimulates new bud formation for a more prolific flowering season |
| Improved Air Circulation | Reduces the risk of fungal infections and pest infestations |
| Maintained Plant Health | Prevents the spread of diseases by removing dead or diseased parts |
| Controlled Growth | Keeps the plant’s size and shape manageable |
Conclusion
Pruning your wallflower plant is a rewarding practice that keeps it healthy and enhances its beauty. Follow this complete guide. It will ensure your wallflower thrives. It gives lush foliage and lots of vibrant blooms year-round.
Regular maintenance, the right tools, and an understanding of your plant’s needs are key to successful pruning. Happy gardening!


