A Step-by-Step Guide to Sterilizing Soil With Fire Safely and Naturally
Are you ready to ignite your gardening prowess and witness the magic of nature’s own sterilization technique? If you’re a green-thumb enthusiast, seeking a natural and effective way to banish pesky plant pests and eradicate those bothersome weed seeds, then look no further! In this step-by-step guide, we’ll embark on a fiery journey through the art of soil sterilization with none other than the elemental force of fire itself.
But hold on; don’t let the word “fire” ruffle your gardening senses. This method is not about causing chaos in your garden but rather harnessing the power of controlled heat to create a haven for your plants to thrive. With a touch of safety precautions and a sprinkle of patience, you’ll soon witness a disease-free, bountiful garden like never before.
Let’s explore this eco-friendly, soil-saving secret that will leave you and your plants truly mesmerized!
Understanding the Importance of Soil Sterilization
Before we delve into the process of soil sterilization, let’s grasp the significance of this technique. Soil sterilization involves the elimination of harmful organisms and unwanted seeds from the soil, creating a clean slate for your plants to grow on. It serves multiple purposes, including:
- Pathogen Removal: Soil sterilization eradicates harmful bacteria, fungi, and nematodes that can cause plant diseases.
- Weed Control: By destroying weed seeds, sterilization prevents aggressive weed growth that can outcompete your desired plants.
- Enhanced Seed Germination: Sterile soil provides an ideal environment for seeds to germinate, ensuring a higher success rate for your plantings.
- Optimized Soil Structure: Soil sterilization can improve soil structure by eliminating compacted areas and promoting better drainage. This contributes to root growth and nutrient absorption, creating a healthier growing environment.
- Disease Prevention: Sterilization acts as a preventative measure, particularly in areas with a history of soil-borne diseases. By eradicating potential threats, you create a safer environment for your plants to thrive.
- Research and Experimentation: Soil sterilization is crucial in scientific research and experimental gardening. It provides a controlled foundation for studying plant growth, soil interactions, and the effects of specific treatments.
- Rejuvenation of Old Soil: Rejuvenating tired or depleted soil through sterilization can revive its fertility and extend its productive life, benefiting your garden in the long run.
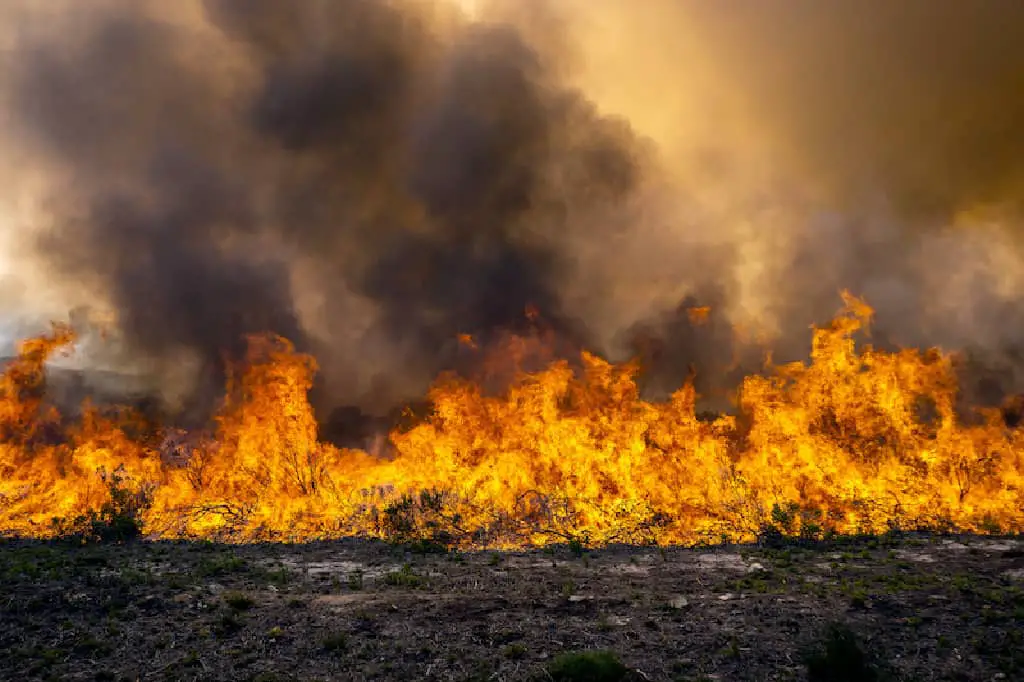
Why Sterilize Soil with Fire?
Sterilizing soil with fire serves as a potent weapon in the battle against detrimental pests and pathogens. The primary objective of soil sterilization is to create a clean slate, free from harmful microorganisms and weed seeds, giving your plants a head start in their journey to robust growth.
When pathogens and pests are left unchecked, they can wreak havoc on your plants, stunting their development and compromising their ability to absorb vital nutrients. By harnessing the power of fire, you can effectively neutralize these threats, ensuring your plants have the best possible chance to thrive.
The process of soil sterilization involves carefully controlling the application of heat to the soil. This controlled heat treatment, usually achieved through open flames or steam, targets and eradicates unwanted organisms without causing long-term harm to the soil’s beneficial microorganisms.
As the heat penetrates the soil, harmful pests and pathogens are unable to survive, creating a healthier growing medium for your plants. Additionally, weed seeds, which often lie dormant in the soil, are incinerated, preventing them from sprouting and competing with your desired plants for resources.
Sterilizing soil with fire is especially beneficial for starting new plantings, cultivating delicate seedlings, and establishing disease-free environments for indoor gardening.
As with any gardening method, it’s essential to use soil sterilization judiciously and in conjunction with sustainable soil management practices, striking a harmonious balance between protecting your plants and preserving the soil’s long-term health.
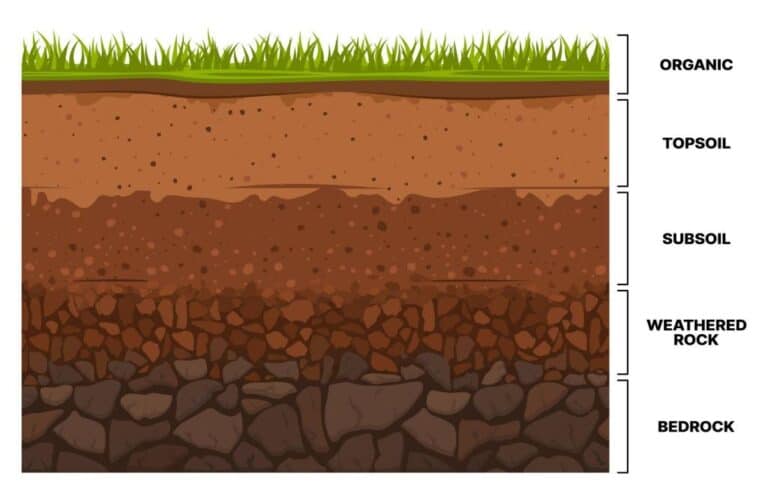
Identifying Suitable Soil Types for Sterilization by Fire
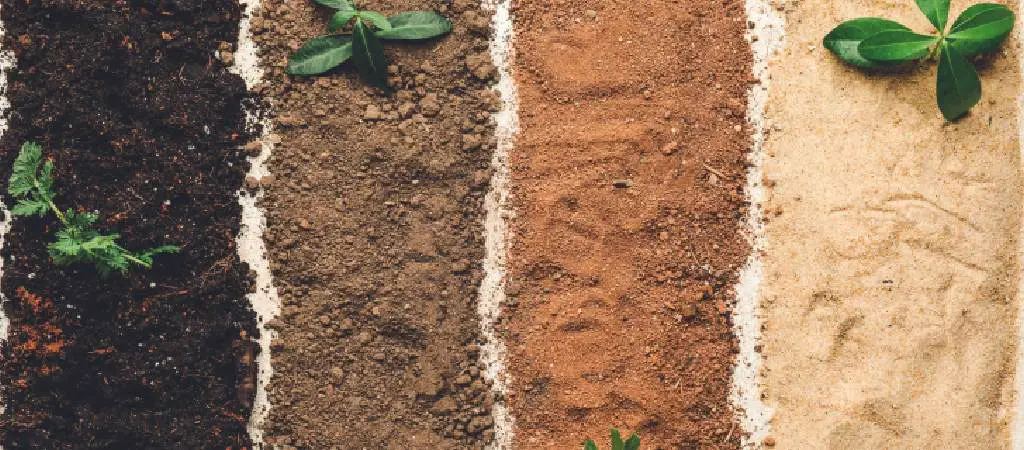
When it comes to sterilization by fire, not all soil types are created equal. Each type of soil has its own distinct properties that can influence the effectiveness and outcome of the sterilization process. Understanding which soil types are suitable for this method is essential to ensuring successful soil sterilization.
- Sandy Soils: Sandy soils tend to be well-draining, allowing heat to penetrate more easily. This characteristic makes sandy soils relatively suitable for sterilization by fire. However, the drawback is that they may require higher temperatures and longer exposure times to achieve complete sterilization.
- Loamy Soils: Loamy soils strike a balance between sand, silt, and clay, making them a popular choice for many gardeners. Loamy soils can be effectively sterilized by fire, thanks to their favorable drainage and heat retention properties. The sterilization process may be more efficient in loamy soils compared to sandy ones.
- Clayey Soils: Clayey soils have high water retention capabilities, which can pose challenges during fire sterilization. The excess moisture in clayey soils may hinder the uniform distribution of heat, making it more challenging to achieve consistent and thorough sterilization.
- Rocky Soils: Rocky soils, with their rocky debris and limited contact with the surrounding soil, may not be ideal candidates for fire sterilization. The presence of rocks can create air pockets that insulate the soil, preventing uniform heating.
Safety Precautions Before Starting the Soil Sterilization Process
Safety should be your top priority when sterilizing soil with fire. To ensure a smooth and secure process, follow these essential safety measures:
- Assess the Site: Carefully inspect the area where you plan to carry out the sterilization. Remove any flammable materials, such as dry leaves or debris, from the vicinity.
- Gather Safety Equipment: Equip yourself with fire-resistant gloves, safety goggles, and a fire extinguisher to handle any unexpected situations.
- Notify Neighbors and Authorities: Inform your neighbors about your sterilization plans to avoid any potential concerns, and be aware of local regulations or permits that may be required.
A Step-by-Step Guide to Sterilizing Soil With Fire
Step 1: Choose the Right Time and Area
Pick a suitable time to conduct the soil sterilization process. Opt for a day with mild weather conditions and avoid windy days that could cause the fire to spread uncontrollably. Also, ensure that you have enough space for the procedure. A clear, open area away from any flammable objects or structures is ideal.
Step 2: Gather the Necessary Equipment
For this method, you’ll need the following equipment:
- Metal Containers: Select sturdy metal containers like steel drums or cans, as they can withstand high temperatures and keep the fire contained.
- Thermometer: To monitor the temperature and ensure it reaches the necessary level for sterilization.
- Fire Source: You can use wood, charcoal, or a propane torch as the fire source.
- Water Source: Keep a water source nearby in case of emergencies or to extinguish the fire when the process is complete.
Step 3: Prepare the Soil
Before sterilizing, clear the area of any debris, rocks, or weeds. Break up large clumps of soil to ensure even heat distribution during the process. Loose, aerated soil will be more receptive to sterilization.
Step 4: Fill Containers and Ignite
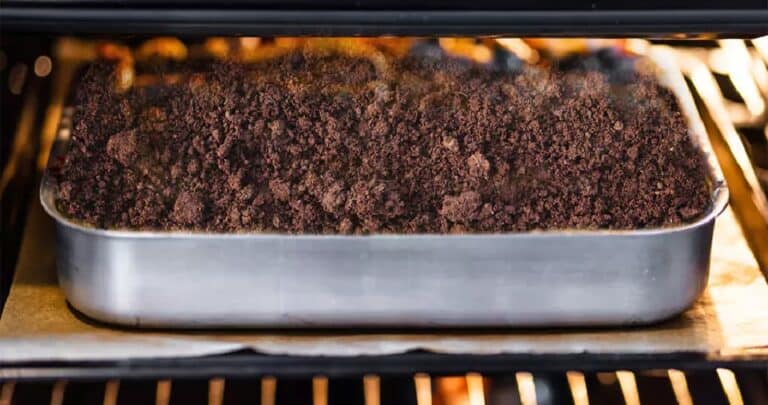
Divide the soil into manageable portions and fill the metal containers. Aim for a depth of around 6 inches to ensure effective sterilization. Light the fire source and place the filled containers over it. Avoid overfilling the containers to prevent the soil from spilling out.
Step 5: Monitor the Temperature
As the fire burns, it’s crucial to monitor the temperature inside the containers. Use a thermometer to gauge the heat. The goal is to reach and maintain a temperature of around 180–200 °F (82–93 °C). This temperature range is sufficient to eliminate most pathogens and weed seeds effectively.
Step 6: Keep a Safe Distance
While the sterilization process is ongoing, keep a safe distance from the fire. Avoid direct contact with the containers, as they will become extremely hot. It’s advisable to wear protective gear such as gloves and long sleeves.
Step 7: Stir the Soil
To ensure uniform sterilization, gently stir the soil within the containers using a long-handled tool. This will help distribute the heat evenly and expose all soil particles to the required temperature.
Step 8: Water the Soil
Once the soil has reached the target temperature and has been stirred adequately, carefully remove the containers from the fire source. Allow the soil to cool down naturally. To speed up the cooling process, you can lightly water the soil. This will also aid in settling the soil’s texture.
Step 9: Test the Soil
After the soil has cooled down, it’s essential to test it for readiness. Take a sample from various parts of the container and send it for professional testing. This will confirm if the sterilization process was successful and if the soil is now free from harmful pathogens and weed seeds.
Alternative Natural Methods of Soil Sterilization
Although fire sterilization is effective, there are alternative natural methods that you can consider:
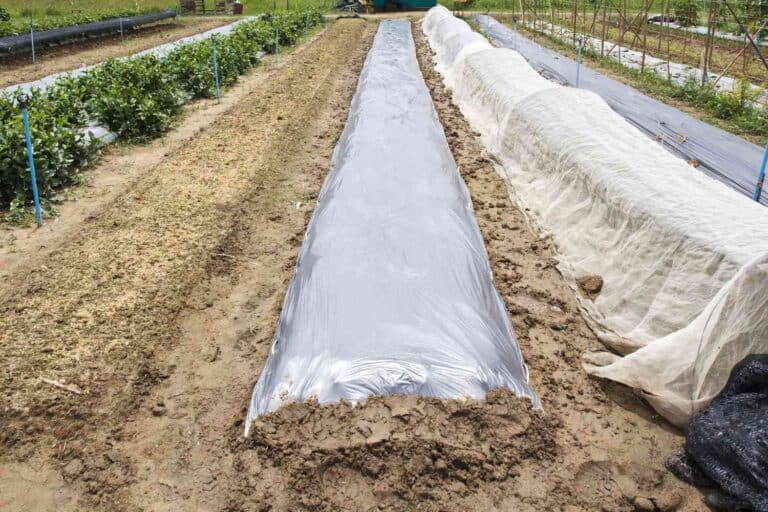
- Solarization: Utilize the sun’s heat to sterilize soil by covering the moist soil with a transparent tarp, trapping the heat and killing pathogens and weed seeds.
- Steam Sterilization: Apply steam to the soil to eliminate harmful organisms while retaining more nutrients compared to fire sterilization.
- Soil Pasteurization: Use lower-temperature treatments to sterilize soil, making it suitable for sensitive plants that might not withstand the high heat of fire sterilization.
Incorporating these natural methods can provide additional options for different gardening or agricultural scenarios.
Common Mistakes and Troubleshooting during Soil Sterilization
Even with proper planning, mistakes can happen during soil sterilization. Here are some common issues and how to address them:
- Overheating and Soil Damage: Excessive heat can harm the soil structure, leading to decreased water retention and nutrient loss. Monitor temperature closely and adjust the fire intensity if necessary.
- Incomplete Sterilization and Pathogen Resurgence: If pathogens persist, reevaluate your sterilization process and consider reapplying the method if needed.
- Dealing with Unexpected Challenges: Be prepared for unforeseen obstacles like sudden weather changes or equipment malfunctions. Having contingency plans in place will help you manage these challenges smoothly.
Conclusion
In conclusion, harnessing the power of fire as a soil sterilizer offers a time-tested and natural approach to ensuring the health and vitality of your plants. This age-old technique of soil sterilization through fire has proven effective in eliminating soil pathogens and pests, safeguarding your garden’s well-being in a sustainable manner.
By following a step-by-step guide to safely execute fire-based soil sterilization, you tap into traditional practices that have been relied upon for generations. The process’s simplicity, combined with its potency, allows you to create a clean slate for your plants to thrive without resorting to chemical interventions.
The use of fire for soil sterilization not only eliminates harmful pathogens but also promotes a natural balance within your garden’s ecosystem. As you implement this technique, keep in mind the importance of safety measures to prevent any unintended consequences. By combining ancient wisdom with modern understanding, you can utilize fire as a powerful tool to create an environment where your plants can flourish without the interference of detrimental soil-borne agents.
Incorporating fire-based sterilization into your gardening toolkit pays homage to time-honored practices while fostering a healthier, more vibrant garden that stands as a testament to your commitment to natural and sustainable gardening methods.
FAQs on Guide to Fire Treatment for Disease-Free Soil
What are the best natural methods for soil sterilization?
The best natural methods for soil sterilization include solarization, using steam from compost, and sterilization with fire. Each method has its advantages, so choose the one that suits your gardening needs and resources.
Can I sterilize soil with boiling water?
Yes, you can sterilize soil with boiling water. Pouring boiling water over the soil helps kill off many pathogens and weed seeds near the surface. However, it may not be as effective in penetrating deep into the soil compared to other methods like fire or pasteurization.
Is soil pasteurization more effective than using fire?
Soil pasteurization can be more effective than using fire, as it involves heating the soil to a lower temperature for a longer duration. This method reduces harmful organisms while preserving beneficial microbes that support plant growth.
What types of plants benefit from sterilized soil?
Various plants benefit from sterilized soil, especially those susceptible to diseases and root pests. Delicate seedlings, high-value crops, and plants grown in greenhouse environments often thrive better in sterilized soil.
How long does it take to sterilize soil with fire?
The time to sterilize soil with fire depends on factors like the type of soil, container size, and the intensity of the fire. On average, the process can take anywhere from 30 minutes to a few hours.
Are there any risks of using fire to sterilize soil?
Using fire to sterilize soil comes with potential risks, such as accidental fires, burns, or harm to nearby plants and wildlife. It’s crucial to take safety precautions, choose a suitable location, and have fire-extinguishing measures in place.
Is soil sterilization necessary for all gardening and agricultural practices?
Soil sterilization is not always necessary for gardening or agriculture. It’s most beneficial when dealing with persistent soil-borne diseases or severe weed infestations. Regular soil
Can I use a bonfire in my backyard to sterilize soil for gardening?
Using a bonfire in your backyard for soil sterilization is not recommended due to safety and environmental concerns. Opt for controlled methods like fire in metal containers to avoid accidents and minimize environmental impact.
Are there any organic or non-toxic alternatives for soil sterilization?
Yes, there are organic and non-toxic alternatives for soil sterilization. Solarization, using steam from organic compost, or biofumigation with cover crops are some eco-friendly methods to consider.
What precautions should I take to protect nearby plants and wildlife during soil sterilization?
During soil sterilization, protect nearby plants and wildlife by choosing a safe location away from flammable materials, using containers with lids to control the fire, and having water or fire extinguishers ready for emergencies.
How deep into the soil should the heat penetrate for effective sterilization?
For effective soil sterilization, the heat should penetrate at least 6 inches into the soil. Stirring the soil during the process can help ensure uniform heat distribution.