How to Grow Quinoa from Store Bought Seed? Simple Guide

Quinoa, often celebrated as a superfood, is a versatile and nutritious grain that can be grown at home. Have you ever wanted to grow your own quinoa right in your backyard, starting from store-bought seeds?
Imagine harvesting nutritious, protein-rich quinoa from your garden. In this article, we’ll show you how to embark on this exciting journey of quinoa cultivation. You’ll learn to select the right seeds. You’ll also learn to care for your plants through harvest. You’ll learn key techniques and tips for success.
Are you a new gardener? Or, do you want to expand your crop range? This guide will give you the knowledge to grow quinoa at home. Then, you can enjoy its health benefits fresh from your garden.
Understanding Quinoa
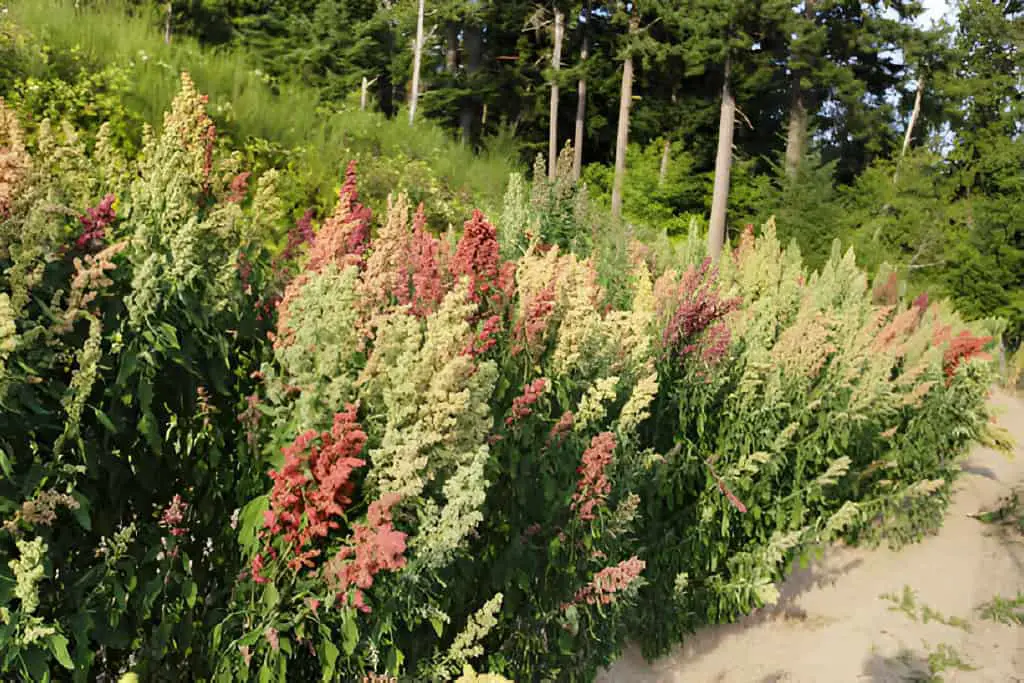
Quinoa (Chenopodium quinoa) is a flowering plant in the amaranth family. It is primarily grown for its edible seeds, which are rich in protein, fiber, vitamins, and minerals. Originally cultivated in the Andean region of South America, quinoa thrives in a variety of climates and soil conditions.
Key Characteristics:
- Appearance: Quinoa plants have broad leaves and clusters of small, edible seeds.
- Varieties: There are several quinoa varieties, with white, red, and black being the most common.
- Nutritional Benefits: This food has nutritional benefits. It is high in protein and gluten-free. It is packed with essential amino acids, vitamins, and minerals.
Preparing to Grow Quinoa from Store Bought Seed
Yes, you can grow quinoa from store-bought seed. But, there are specific requirements and precautions for success. Below are some preparations. You need them to plant your store-bought quinoa.
Materials Needed
Before starting your quinoa garden, gather the following materials:
- Store-bought quinoa seeds: Ensure they are organic and untreated.
- Seed trays or pots: For starting seeds indoors.
- Seed starting mix: A light, well-draining medium.
- Garden tools: Trowel, rake, and watering can.
- Fertilizer: Organic compost or balanced fertilizer.
Selecting and Preparing Seeds
- Choosing Seeds: Pick organic, untreated quinoa seeds. Get them from a health food store or online supplier.
- Preparing Seeds: Rinse the seeds thoroughly to remove any saponins, which can inhibit germination.
Preparing the Garden Bed
- Location: Choose a sunny spot with well-draining soil. Quinoa thrives in full sun.
- Soil Preparation: Loosen the soil to a depth of 6-8 inches. Amend with compost or organic matter to improve fertility and drainage.
- pH Level: Quinoa prefers slightly acidic to neutral soil (pH 6.0-7.5).
Planting Quinoa
Starting Seeds Indoors
- Timing: Start seeds indoors 3-4 weeks before the last expected frost date.
- Planting Seeds: Fill seed trays or pots with seed starting mix. Plant seeds ¼ inch deep and lightly cover with soil.
- Germination: Place the trays in a warm, sunny location. Keep the soil moist but not waterlogged. Seeds should germinate in 4-10 days.
Transplanting Seedlings
- Hardening Off: Accustom the seedlings to outdoor conditions by placing them outside for a few hours each day. Increase the duration over a week.
- Planting Outdoors: Frost danger passed. Seedlings are 4-6 inches tall. Then, move them into the garden. Space plants 10-12 inches apart in rows 18-24 inches apart.
- Watering: Water the seedlings thoroughly after planting and keep the soil consistently moist.
Direct Sowing
- Timing: In warmer climates, you can sow seeds directly into the garden after the last frost date.
- Planting Seeds: Sow seeds ¼ inch deep, spacing them 10-12 inches apart.
- Thinning: Once seedlings are a few inches tall, thin them to the strongest plants.
Caring for Quinoa Plants
Watering
- Consistency: Keep the soil evenly moist, especially during the germination and early growth stages. Avoid overwatering, as quinoa is drought-tolerant once established.
- Mulching: Apply mulch around the plants to retain soil moisture and suppress weeds.
Fertilizing
- Initial Feeding: Incorporate compost or a balanced fertilizer into the soil at planting time.
- Side Dressing: Apply a side dressing of compost or a balanced fertilizer when the plants begin to flower.
Weeding
- Regular Maintenance: Keep the area around the plants free of weeds, which can compete for nutrients and water.
- Mulching: Use mulch to help suppress weeds and retain soil moisture.
Pest and Disease Management
- Common Pests: Watch for aphids, leaf miners, and flea beetles. Use organic insecticides or natural predators to control infestations.
- Diseases: Prevent fungal diseases by ensuring good air circulation and avoiding overhead watering.
Supporting Plants
- Staking: In windy areas, consider staking the plants to prevent them from falling over.
- Trellising: Use trellises to support taller plants and improve air circulation.
| Read: Can You Grow Taro from the Grocery Store? |
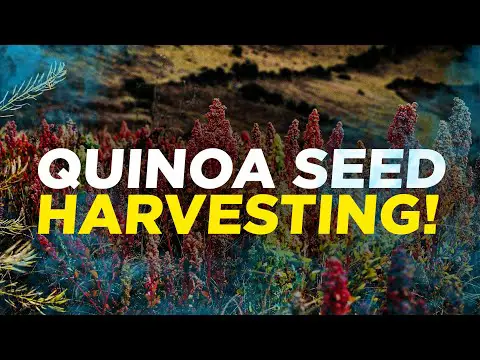
Harvesting Quinoa
Signs of Readiness
Quinoa is ready to harvest when the leaves have dropped and the seed heads are dry and firm. The seeds should be hard and difficult to dent with a fingernail.
Harvesting Technique
- Cutting Plants: Use a sharp knife or pruners to cut the seed heads from the plants.
- Drying: Hang the seed heads upside down in a dry, well-ventilated area for 1-2 weeks to ensure they are completely dry.
Threshing and Cleaning Seeds
- Threshing: Rub the seed heads between your hands or use a threshing machine to separate the seeds from the chaff.
- Cleaning: Use a sieve or fan to winnow the seeds, removing any remaining chaff and debris.
Storing Quinoa Seeds
- Storage: Store cleaned quinoa seeds in an airtight container in a cool, dry place. Properly stored seeds can last for several years.
- Freezing: For longer storage, consider freezing the seeds to extend their shelf life.
Using Homegrown Quinoa
Cooking Quinoa
- Rinsing: Rinse quinoa seeds thoroughly under cold water to remove any remaining saponins.
- Cooking: Use a 2:1 water-to-quinoa ratio. Bring to a boil, reduce heat, cover, and simmer for 15-20 minutes until the water is absorbed and the quinoa is tender.
Culinary Uses
- Salads: Add cooked quinoa to salads for a nutritious boost.
- Baking: Use quinoa flour in baking recipes for added protein and fiber.
- Breakfast: Enjoy quinoa as a breakfast cereal with milk, fruits, and nuts.
Troubleshooting Common Issues
Poor Germination
- Causes: Seeds may be too old, or soil temperature may be too low.
- Solution: Use fresh seeds and ensure the soil temperature is between 60-70°F (15-21°C).
Slow Growth
- Causes: Insufficient sunlight, poor soil nutrition, or inadequate watering.
- Solution: Ensure plants get at least 6-8 hours of sunlight. Add compost to the soil and keep it moist.
Yellowing Leaves
- Causes: Overwatering, nutrient deficiencies, or pest infestations.
- Solution: Adjust watering practices, apply balanced fertilizer, and monitor for pests.
Seed Shattering
- Causes: Harvesting too late, high winds, or birds.
- Solution: Harvest seed heads when they mature. Stake plants and use bird netting if needed.
| Read: Guide to Growing Eggplant from Store Bought |
Advanced Growing Techniques
Succession Planting
To ensure a continuous harvest, sow new seeds every 2-3 weeks. Do this during the growing season. This technique helps you avoid a glut of quinoa all at once and extends your harvest period.
Companion Planting
Grow quinoa alongside compatible plants to enhance growth and deter pests. Good companions include beans, corn, and squash. Avoid planting near spinach and beets, as they can attract similar pests.
Seed Saving
- Selecting Plants: Choose the healthiest plants with the best seed heads for seed saving.
- Harvesting Seeds: Follow the same harvesting and cleaning process as for eating seeds.
- Storing Seeds: Keep seeds in a cool, dry place for planting in the next season.
Conclusion
Growing quinoa from store-bought seeds is a rewarding and enjoyable gardening project. Growing quinoa from store-bought seeds might seem daunting. But, it’s actually straightforward with the right knowledge and prep. This simple guide will take you through each step, ensuring a successful quinoa harvest.
Follow this guide. You can grow healthy plants and enjoy a big harvest of homegrown quinoa. Remember to pick a sunny spot. Also, prepare the soil well. And, care for the plants all season.
With some effort and attention, you’ll soon be harvesting your own quinoa. Then, you can enjoy its many uses in cooking. Happy gardening!